Monday, February 29, 2016

March Activity List


Spring is on the way! and while I consider myself a real lover of the winter, I always get so excited when Spring is on the way.  

There is no better time to get out there, start new healthy habits being active, Join a spring sports league, start having a daily walk, plant a garden - the possibilities are endless! 


the March Activity List is up and ready for you to download and print out! 


Monday, February 22, 2016

Black Bean and Quinoa Enchilada Bake


I know that sounds like a mouthful, but it is really just a few ingredients from your pantry and freezer and you have dinner on the table in less than 30 minutes. 


 INGREDIENTS:
1 cup uncooked quinoa, rinsed
2 cups water

1 bag frozen vegetables Southwest Mix
2 (15 oz) cans black beans, drained and rinsed
2 cups red enchilada sauce
2 cups shredded Mexican cheese

Toppings: Sliced green onions, avocado slices, sour cream, optional


DIRECTIONS:

1. Preheat the oven to 350 degrees F. Grease a 9x13 baking dish with cooking spray and set aside.


2. Be sure to rinse you quinoa first! Add quinoa and water to a medium saucepan and bring to a boil over medium heat. Boil for 5 minutes. Turn the heat to low and simmer for about 15 minutes, or until water is absorbed. Remove from heat and fluff with a fork. Cover quinoa and set aside.

3. In a large bowl, add the cooked quinoa, black beans, and bag of frozen vegetables. Stir to combine. Pour in the enchilada sauce and stir. Add 1/2 cup shredded cheese.

5.Pour the black bean and quinoa mixture into the prepared baking dish. Top with remaining shredded cheese. Cover the pan with foil. Bake for 20 minutes, then remove foil. Bake an additional 10 minutes, or until the cheese is melted and edges are bubbling. Remove from the oven, and let cool for 10 minutes. Garnish with toppings, if desired. Serve warm.


If quinoa is a little pricey for you, or if it isn't something your family likes - brown rice makes a great substitute.

I really think that fresh toppings make all the difference. The cilantro, green onions and avocado were a perfect addition. Joseph had salsa with his and declared it even more perfect, but since he took the last of salsa, I can't attest to that.

I think this would make an excellent taco salad filler. It was excellent the next day heated up, and I am thinking that it would freeze amazing.


Friday, February 19, 2016

Avoiding Empty Calories

Changing the way that you eat can be hard. But avoiding "empty" calories helps you reach your healthy goals without feeling like you're dieting.
I think that we all know our body needs a certain amount of energy each day. Energy comes from food in the form of calories. Calories let you function and keep doing your daily activities. But after your body meets its needs, it stores extra calories as fat. Most of us get plenty of calories in our diet-often too many.
 I was very surprised the other day when I was talking to one of my kids and he said, "calories are the things that make you fat". I felt like I had let him down and not taught him better. We all need calories to survive - they are what keep us alive. 

Foods with empty calories have lots of calories but very few nutrients like vitamins and minerals. 
"Convenience foods," (or junk foods as we used to say back in the day)  like packaged snacks, chips, and sodas, are common sources of empty calories. 
Nutrient-rich foods, on the other hand, have a lot more nutrients in relation to their calories. A few examples are vegetables, peanut butter, bran cereal with fruit, and fish.

Tips for avoiding empty calories

Replacement food and drinks
Instead of this:Choose this:
Sugar-sweetened drinks like soda, energy drinks, and sweetened coffee drinks
Water, no-sugar-added fruit juices, tea or coffee, tomato juice, and other vegetable juices
Whole milk and dairy products made from whole milk
Fat-free or 1% milk and other low-fat dairy products
High-fat meats like many cuts of beef, corned beef, pork sausage, and luncheon meats
Low-fat ground beef, turkey breast, and skinless chicken
Sugary treats like cakes, candies, and cookies
Fruits, low-fat yogurt, and treats made with less sugar
Chips, crackers, french fries, and other fried treats
Baked chips, air-popped popcorn, and whole-grain crackers
Breads made with refined flour such as white, sourdough, and ciabatta breads
Breads made with whole grains: whole wheat, rye, and sprouted wheat (They have lots of fiber.)
High-fat salad dressings
Low-fat or yogurt-based salad dressings

Tips for making the most of the calories you eat

Choose foods that have lots of nutrients. Look for foods that are high in:

  • Fiber. It's found in beans and peas. It's also in fruits, vegetables, nuts, and whole grains.
  • Potassium. It's in potatoes and bananas as well as other fruits, vegetables, and milk products.
  • Calcium. It's in milk and milk products (including yogurt and cheese). It's also in certain leafy green vegetables (broccoli, spinach, kale), beans and peas, and some nuts.
  • Vitamin D. You can find it in egg yolks, liver, saltwater fish, and vitamin D-fortified dairy products.
  • Magnesium. Sources include nuts, whole grains, dark green vegetables, seafood, and cocoa.

Wednesday, February 17, 2016

Sugar Cookie Bars


If the displays at my local grocery stores are any indicator - I am not the only one who is tempted to buy those giant pink sugar cookies. 

I say tempted, because I bought them - lots of times... and mostly they are not good. But I love what they are trying to be.  I love soft sugar cookies that are frosted with frosting as thick as the cookie itself. But those chemical filled cookies - they just don't taste like what I imagine they'll taste like, they are a poor substitute for what I really want. 


Sugar cookie makers are the tri-athletes of the baking world. No sane person could actually love something that is that much work.  Once upon a time, it was a secret dream in my heart to be a sugar cookie maker - I bought all the giant cookie cutters that I could get my hands on, and somewhere in the back of the cabinet that is above my fridge, I have about 40 colors of wilton's gel food coloring. I even traded some knitted hats for a woman's secret family sugar cookie recipe. (REALLY!) 


But do you know what, it turns out that I am just too lazy to make cut out sugar cookies with beautiful frosting. 

Thank Goodness!!   I am absolutely the PERFECT person to make sugar cookie bars - because they have ALL the flavor and texture and award winning personality of the famous sugar cookie with almost none of the work. 


INGREDIENTS:

Cookies:
1 cup butter softened
2 cups sugar
4 eggs
1 tsp. vanilla extract
1 tsp. almond extract
5 cups flour
1 tsp salt
½ tsp baking soda


Frosting:
8 oz. cream cheese
½ cup softened butter
4-5 cups powdered sugar
½ tsp almond extract
½ tsp vanilla extract
2 drops red food coloring (optional)


INSTRUCTIONS
Cookies:
Cream butter and sugar until fluffy. Add eggs, one at a time, mixing often each egg. Add vanilla and almond extract and mix. 

In a separate bowl combine the flour, salt, baking soda. Add the dry ingredients to wet ingredients and mix just until combined. 

Spread on a greased baking sheet. (rimmed cookie sheet) and bake at 375 degrees for 10-15 minutes. (You don't want to over bake, just barley starting to brown.)

Frosting:
Combine all ingredients and mix until smooth!


Monday, February 15, 2016

Breakfast Crunch Wraps


I was talking to my sister Kandis the other day and she was telling me that she makes these in advance for her and her boyfriend - They eat them before work or take them camping, or heat them up on early mornings when they are going duck hunting. 

I asked her a bunch of questions about how she made them and stored them and reheated them. I have been wanting to make them, but I wasn't sure how to go about it - and I didn't feel like I had the special kitchen equipment to make them successfully. 


She just makes them on her griddle (she said I could put them in a George Foreman grill or into a panini press.) She wraps them in foil and puts them in the toaster oven at work, in the campfire coals (when camping) or unwraps them and reheats them on her griddle. I had the kids microwaving them, they lost most of their "crunch", but feeding 16 & 17 yr olds at 6am is a lot less about gourmet and a lot more about speed and ease. 


I made a huge batch of these on Saturday morning. They were really easy to put together and if you had older kids they could help out. They really are a ton of work for just a regular breakfast, but they are great for the freezer and something to make ahead of time. 

I scrambled up 18 eggs and added to that a pound of ground breakfast sausage that I had browned and drained. 

I browned up a huge bag or frozen hash browns - I cooked them until they were more on the crispy side, since I knew I was going to be adding them to ingredients that had more moisture in them. 

Then I had a big tall stack of burrito size tortillas. And some shredded cheddar cheese. 

Kandis says that she mixes together equal parts salsa and sour cream and adds that to hers, but the second I start adding condiments - somebody doesn't like it. So I made mine plain. 


To assemble them, I added about 1/4 cup of hash browns to the center of the tortilla and spread it out into a space about the size of my palm. 

Then I added to the top of that 1/4 cup of the scrambled egg and sausage mixture. 

Then I added a generous sprinkling of shredded cheese to make it nice and gooey. 

If you want, add your salsa or any sauces now before you fold it up. 


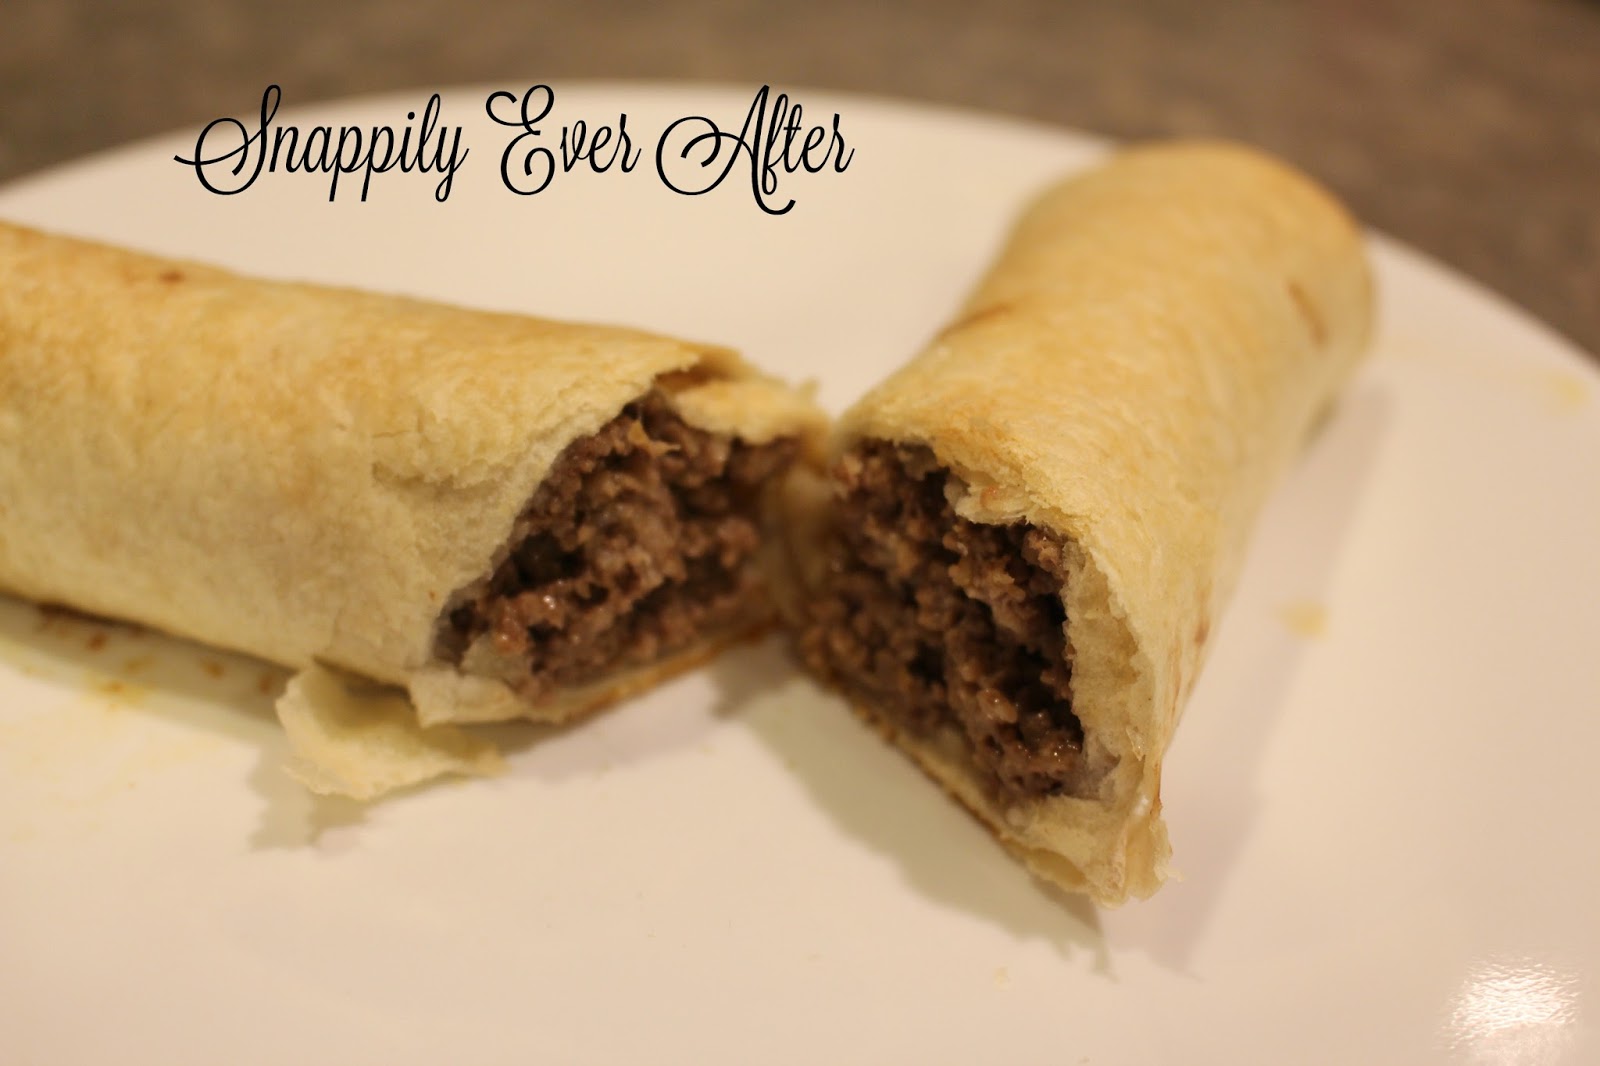
You just fold the edges over, like a star. For some reason, this part was really confusing and intimidating for me.  But once I did the first one, it was really easy and I felt silly for not making these sooner. 

I sprayed my griddle with non-stick cooking spray, and placed the crunch wrap (fold side down) on the griddle.  I then sprayed the top-side so that when I flipped it, it would get nice and crispy. 


I made as many as I had filling for. It was almost 20 when all was said and done. 


I wrapped mine individually in plastic wrap. Then I put them all into a freezer bag. 

I think that how you wrap them up, depends on how you are planning on reheating them. Remember aluminum foil doesn't go in the microwave and you can't put plastic wrap in a toaster oven. 

Also, none of the ones that I made ended up in the freezer, so if you are planning on freezing them, you'll need to put them in a freezer bag or wrap them extra tightly.


Friday, February 12, 2016

Snack Ideas for Preschoolers

Snacks are a huge part of what we eat at our house. I have a pre-schooler and a toddler and those little tummies fill up fast and they empty fast. We have a go-go-go 7 year old and three teenage boys. We do a lot of snacking.

I absolutely agree with the power of healthy snacks. And snacks are a pressure free way to offer small bits of new foods with very little pressure to eat a huge amount of something that is unfamiliar.

Small children tend to go through phases of picky eating. Try to offer a wide variety of fun, nutritious choices. Don't force your child to eat.

Snacks are easier on the budget if you are serving something that costs a little bit more - like nuts or dried fruit.

Don't restrict fat in the diet of children younger than age 2. They need it for their little brains to be able to grow. Most children need whole milk between 1 and 2 years of age. Over the age of 2, you can start to offer fat-free or low-fat milk.


To increase the enjoyment and acceptance of nutritious snacks, let your child help prepare them. Here are a few creative snack ideas:

Ants on a log: Celery stick stuffed with peanut butter and topped with raisins.

Pretzel pops: Cubed cheese on a pretzel stick.

Smudgies: Blend 1½ cups milk with ½ cup peanut butter and 1 package of instant pudding-chocolate or vanilla. Beat well, then let stand for 5 minutes. Spread filling ½-inch thick on graham cracker square. Top with another graham cracker square and then freeze until firm-about 3 hours. Makes 12.

English muffin pizza: Halve an English muffin, spread pizza sauce on top, sprinkle with cheese, then bake at 350°F until cheese melts.

Bagel bites: Slice flavored bagels thin, like coins, and place on a baking sheet. Spray them lightly with olive oil and bake at 400°F for 10 minutes.

Fruit milk shake: Blend together ½ cup strawberry or vanilla yogurt, ½ cup frozen strawberries (frozen without added sugar), and 1 teaspoon lemon juice.


Wednesday, February 10, 2016

Banana Bread with Cream Cheese Filling


Yes, it is as wonderful at it sounds. It will disappear faster than regular banana bread - if you thought that was even possible. And I am so sorry if you don't already have bananas ready to make this, waiting a few days for those bananas to over-ripen is nearly going to kill you. 


I made three loaves of this during the day, and my parents came to watch the kids that night. Before my dad even took his coat off, he was cutting himself a piece of banana bread. And the next day, on his way home from work, he brought me 4 bananas from his house - perfectly ready for banana bread.  


I used my Grandma's traditional banana bread recipe. 

My Grandma's Banana Bread Recipe: 

Ingredients:
1⁄2 cup butter
1 cup sugar
2 eggs, beaten
4 bananas, finely crushed
1 1⁄2 cups flour
1 teaspoon baking soda
1⁄2 teaspoon salt
1⁄2 teaspoon vanilla

Directions:

Cream together butter and sugar. Add eggs and crushed bananas. Combine well.
Sift together flour, soda and salt. Add to creamed mixture. Add vanilla.
Pour into greased and floured loaf pan. Bake at 350 degrees for 60 minutes.
Keeps well, refrigerated. (if it lasts that long)

If you are interesting in making it a little bit healthier, you can go to this Blog Post and read all about my experiments it altering this recipe. 


To make the cream cheese filling - 

Ingredients:

1 large egg
4 ounces softened brick-style cream cheese (lite is okay)
1/4 cup granulated sugar
3 tablespoons all-purpose flour

Directions: - After you make the banana bread batter, in a separate bowl mix together all the ingredients for the filling. 

Pour 2/3 of the banana bread batter into a prepared loaf pan, then pour the cream cheese filling - you aren't going to be able to spread it much, so try and pour it slowly and evenly. 

Then pour the last of the bread batter over the filling. 

Bake as normal (  Bake at 350 degrees for 60 minutes )


If you have any that you are going to need to store, be sure you do it in the fridge - you essentially have banana bread cheese cake here. It needs to be kept refrigerated. But I don't think you are going to have that problem.  I made three loaves of it - and not a single one lasted into the next day.  I thought I had a few saved for breakfast, but I didn't hide them well enough in the fridge and were devoured at 11:00 pm by foraging teenagers. 


I am saving bananas in my freezer to make another batch. I only have three loaf pans, or I would probably make more.  I told Joseph, I think our family could survive on banana bread alone. He whole-heartedly agreed. 


 Banana Bread is the food of my people - it always has been. 


Monday, February 8, 2016

Crispy Meat Burritos - Taquitos


Back in the days of my career as a fast food making teenager, I made about a million crisp meat burritos. They aren't anything fancy, taco meat, some cheese, roll it up in a tortilla and the deep fry them. I have a lot of people in my family that would go there and eat them every single day - for 1.99$ a burrito! (say What?!) 


There is an online cooking blog that I follow that has a pretty popular chicken taquito recipe. It is essentially just a chicken enchilada filling with cream cheese and green chilis. Super simple, you roll it up and then put it on a baking sheet that you have sprayed with non-stick cooking spray, and then spray the tops / sides of the burritos with more non-stick cooking spray (or brush with some canola oil) and bake in the oven. 


To make the meat ones, I did essentially the same thing. I made the filling by browning 2 pounds of extra lean ground beef. (I actually made so many because these freeze awesome for dinner another night - and my kids go crazy for them as leftovers - they aren't as "crispy" but they don't seem to care one bit. 


So I browned 2 pounds of ground beef - and added my taco seasoning to make taco meat, just like usual then I pulled it off the heat and put it into a bowl and added 2 cups of cheese - just grated cheddar. And I stirred in the cheese to melt it. 


Then I put about 1/4 cup filling in each tortilla and rolled them up and put them on the baking sheet.  I didn't spray the bottom because I used my silicone sheets, but if I didn't I would have put down some foil and sprayed it with non-stick cooking spray.

If you are going to freeze some, you'll want to do it at this point. "Pre-Cooked" Then when you want to have them for dinner, get them out about an hour before and let them defrost, then cook them in your oven.

Spray the tops / side with cooking spray - this is what is going to make them nice and crispy.

Put them into your oven and bake them at 400 for 10-15 minutes, (depending on where your racks are and how many you have on your tray and how dark you want them to be.


 I don't fill mine too full, because I think it maintains that authenticity of what I am trying to re-create. You can experiment with what your family likes.  - I have really been thinking about mixing some brown rice or quinoa with the ground beef and seeing how that goes over. I did a refried bean and ground beef mixture and I lost half of my fans.


These are so simple, you are going to love making them and having them around for quick dinners, hearty snacks, and on the go lunches.

Wednesday, February 3, 2016

Simple Edamame


A while back Edamame was something that few people had heard of on a regular basis and almost nobody made at home. It was served as an appetizer at fancy Japanese restaurant. Joseph and his boys used to eat at his sister's restaurant often and they absolutely love them. 

They are available at all the grocery store freezer aisles and lots of them even have them fresh. Edamame is as common as peas and carrots, sold in 12-ounce or 1-pound plastic bags and sold cheap.

So cheap that for four or five bucks you can buy a pound of organic edamame, and for considerably less than that, a pound of non-organic. Since I figure you’re getting a quarter-pound or less when you order them at a restaurant, and paying (no doubt) up to seven bucks per serving, this alone should be an incentive to buy a bag.


The cooking, at least for the style in which they’re served in restaurants, is along the lines of “duh.” Boil, drain, salt, serve. Literally, that’s it. Keep the cooking time short and use coarse salt. I can think of no other tricks.


There are ways to use edamame that go beyond the dead simple. One is to simply drizzle them with good soy sauce, a bit of lemon or sesame oil, or all three, and serve as usual.


Other ideas, all of which are essentially garnishes to be used alone or in combination with the above treatments (these are all good whether the beans are still in or taken out of their shells):

• Toast sesame seeds in a dry skillet until they pop, and sprinkle them over the top.

• Add a few chiles or a squeeze of sriracha to the heating oil and drizzle that.

• Use a few drops of rice vinegar in place of lemon juice.

• Toast nori (dry, in the oven or a skillet) and crumble that over the beans; mix and serve quickly.

• Chop peanuts or walnuts (toast first if necessary, until lightly browned) and sprinkle on top.

• Sweat a little minced ginger or garlic, or both, in peanut oil and toss with the cooked beans.

• Grate lemon zest over all.

• Top with chile powder, curry powder, pimentón (smoked paprika), five-spice powder or, perhaps best, shichimi (the Japanese spice mix also called togarashi).


Monday, February 1, 2016

The 5 Second Grocery Money Saving Tip

I don't know too many people who can afford to not watch their grocery budget. Every little bit helps, and if money isn't tight at your house - I am sure you can find lots of things you would rather spend your money on than groceries. 


The average American family ends up throwing away 25% of the foods and drinks they buy. That is 1/4 of your whole grocery budget.  For the a typical family of four, they might as well fling $150 straight in the garbage every month!


If they could reduce their grocery waste by just half, that same family of four could chop around $75 a month off their grocery bill. (No coupons required!) That isn't even suggesting that you have no grocery waste, but that you just cut the things that we are wasting in half.  That is a really huge amount, Isn't it!?

Here’s an easy way to do exactly that.

When you put your leftovers away after dinner, do your best to store them in a clear container, so it’s easy to see what’s in there and to avoid discovering some putrid mystery food shoved to the back of the fridge weeks later.

Perhaps make a shelf, just for "ready to eat" leftovers. So when you open the fridge to find something to eat, that can be the first place that you look. You can help your family to look on that shelf or in those specific containers when they are finding something to eat. 

(If you have them available to you - Mason jars are a great way to do this on a budget.)

Then, before you put the container away, take 5 seconds to grab a sticky note and write today’s date on the top. If you don't have sticky notes, use a washable marker and write on the container. 

It helps cut down on those fun conversations that go something like, “Honey, do you remember when we had this spaghetti?”

“Um I don’t know, does it stink?”

“Hmm...I can’t tell, you smell it.” (You, smell it .... No! You smell it...... ) 

“Um...better toss it,” as you see visions of all the members of your family doubled over with food poisoning fluttering through your brain.

So instead of THAT, try this trick to start saving immediately. 

You’ll be much more likely to use up leftovers in time, without the guessing game, or the waste.

Doing those simple little things to save your grocery budget doesn’t have to be complicated or cause you to spend tons of extra time shopping around or standing in the kitchen.

I am learning the greatest results can come from the smallest of shifts in habits. It’s these small changes that help you save money on groceries consistently, month after month, even when you’re super busy.