Showing posts with label Preserving. Show all posts

Monday, December 18, 2017

Pickled Red Onions


I saw these posted on the Utah Food Sense Instagram page a couple of months ago, and I knew I had to make them immediately.  They are everything promised and MORE. They go great on salads, sandwiches, burgers, as toppings for tacos or leftovers than need a little bit of OOMPH!

They take less than 10 minutes to make, so you can always have a jar in your fridge just waiting to be put on everything. You are going to love them, as much as we do. 


Monday, July 24, 2017

Quick Pickled Beets for Your Fridge


A long time ago when someone wrote Sugar and Spice and Everything Nice - They were talking about pickled beets! 

Sometimes we go to a local restaurant and they serve salads with fresh tomatoes in the summer and pickled beets in the winter (I can't decide which one is better *just kidding! totally the Beets)

but the ones I buy at the store, they have WAY too much sugar and honestly they aren't as yummy as the ones you make at home.  


So when the CSA box came and it was full of dark earthy beets, I was over the moon excited - enough to eat and some to pickle. 

I roasted all of them .. 

HERE is my best post about how to do that without making everything in your kitchen beet-stained. 


Ingredients:

1 bunch of red beets (about 1 pound)
½ C thinly sliced white onions
¼ tsp cinnamon
¼ tsp cloves
¼ allspice
¼ tsp whole grain mustard seeds
1 C white vinegar
½ C water
¾ C sugar
¼ tsp salt


Directions:

Cook beets by cleaning, wrapping in foil and baking in a 400ยบ oven for 45 min to 1½ hours, depending on the size of the beets. They are done cooking when they begin to feel soft when you squish them (they're hot - use an oven mitt). Allow to cool for about an hour before you begin the pickling process 

To make the pickling juice, in a large saucepan combine white vinegar, water, organic cane sugar, salt, and spices Stir until the sugar is dissolved.

Simmer for 5 minutes.

While the pickling juice is simmering, peel and rinse the cooked beets and cut into ⅛ inch slices. Also thinly slice your white onions.

After the pickling juice has simmered for 5 minutes add the sliced beets and onions to the saucepan and bring back up to a simmer, then remove from the heat.

Allow the beets to cool, and pour the pickled beets into a glass jar. 

Store covered at the back of your fridge for up to one month.


Monday, July 17, 2017

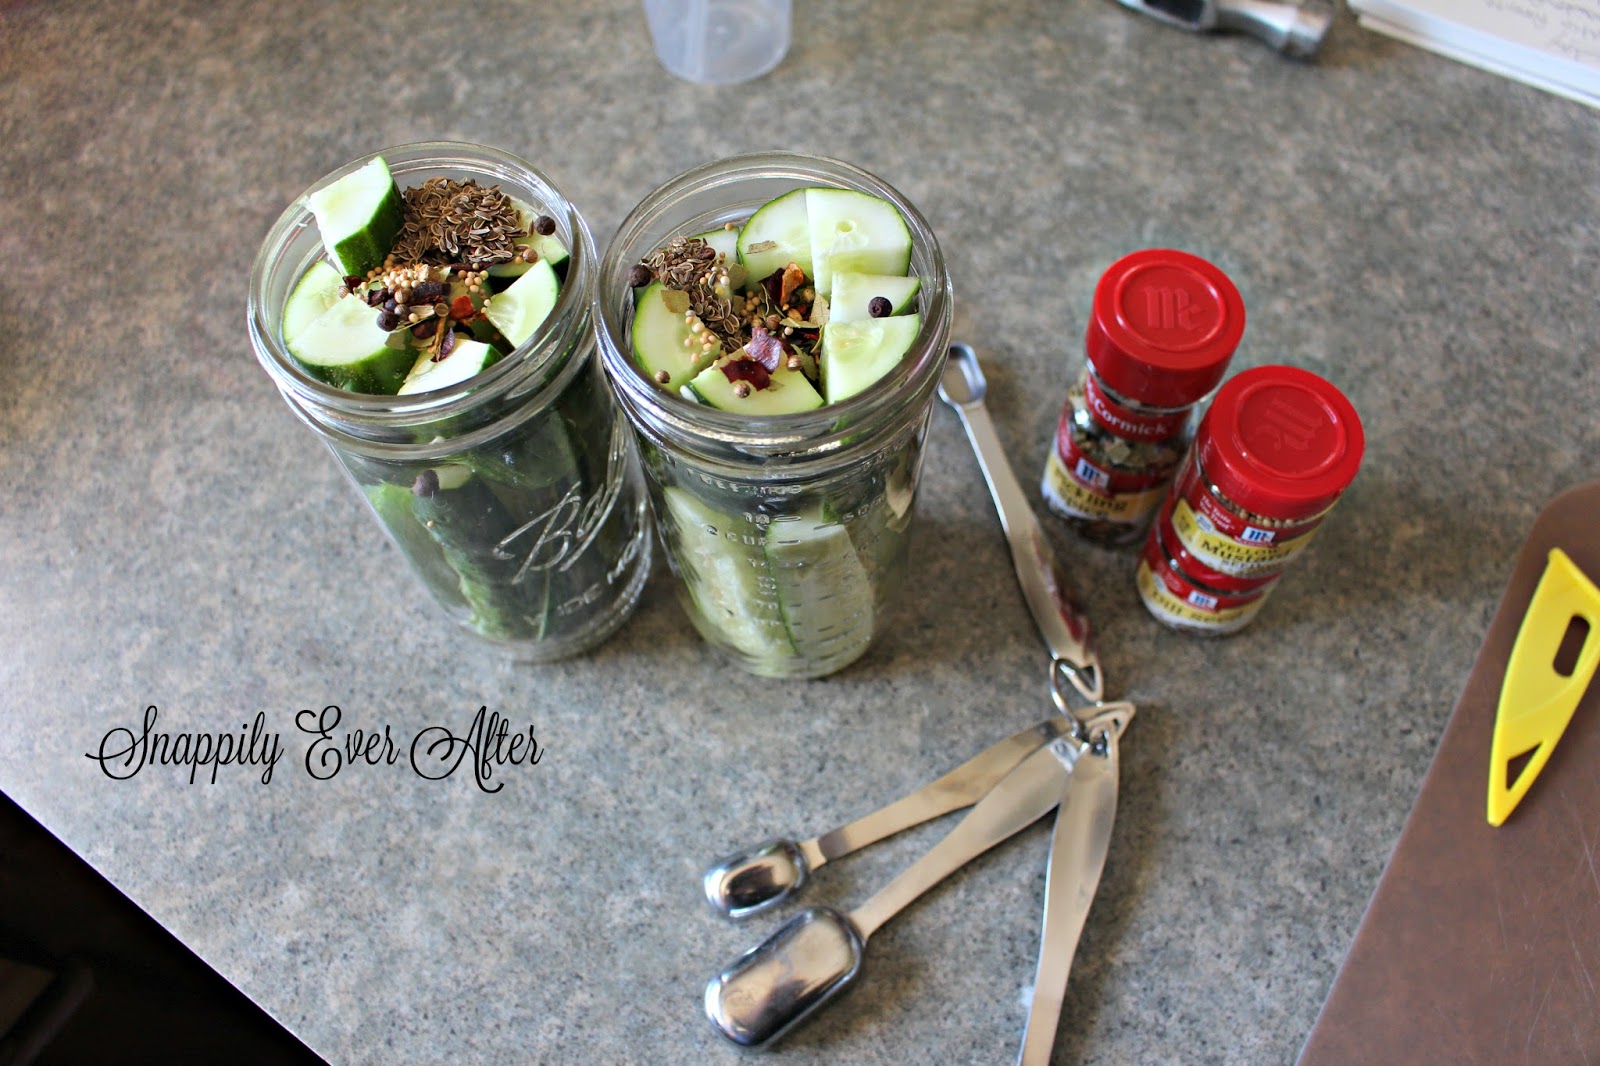
Quick Fridge Pickles with Spices and Garlic


I didn't know whether I should start this blog post out talking about how pickles make every single food better, or by telling you about how much I love finding unexpected things at the Farmers' Market and coming home and doing something amazing with them. 

Which One?  

Farmers' Market, since it is the season. I love going to the markets or the farm stand and seeing what is for sale this week. In my CSA box we got these huge cucumbers - really short fat ones. And all I could see were the giant pickles in the huge jars that you buy.  I wanted to make some so badly. 

I love to take my kids with me and let the browse and pick things out. They are always excited to try what they chose and sometimes they pick out things that I haven't tried either. 


Second, Pickles, Man! do I ever LOVE pickles!

I may own some kind of strange record for blog with the most pickle recipes. They go great on sandwiches, added to salads, to eat plain as a salty snack or for those strange late night, "what's in the fridge" moments. They are a summer staple for lots of people, going on burgers and hot dogs, being chopped and put into potato and macaroni salad - there is even a Dill Pickle Macaroni Salad!

Pickles for President!


If you are hesitant to make your pickles at home because you afraid (or don't want the mess of using a big pot to can and making 20 bottles of pickles) These pickles are just perfect for you. They make very small batches, you don't have to buy a ton of cucumbers and you can eat them all in plenty of time that they won't take up room in your fridge for too long. (although, We Always have a zillion jars of pickles in our fridge *really, a zillion)


Ingredients

2 pounds Kirby cucumbers
1 1/2 cups apple cider vinegar
1 1/2 cups water
2 tablespoons pickling salt
6 garlic cloves, peeled (2 per jar)
1/4 teaspoon crushed red pepper per jar (3/4 teaspoons total)
1 teaspoon dill seed per jar (3 teaspoons total)
1/2 teaspoon black peppercorns per jar (1 1/2 teaspoons total)


Directions

Wash and slice the cucumbers.

In a large saucepan, combine vinegar, water and salt. Bring to a simmer.

Arrange jars on counter and dole out the spices to each. Pack the cucumber slices firmly into the jars. You don't want to damage the cucumbers, but you do want them packed tight.

Pour the brine into the jar, leaving approximately ½ inch head space.

Tap jars gently on counter top to dislodge any trapped air bubbles.

Apply lids and let jars cool. When they've returned to room temperature, place jars in refrigerator. 

Let them sit for at least 48 hours before eating


Wednesday, March 15, 2017

Very Veggie Spaghetti Sauce


One of the first things that I gave up when I became a Food $ense devotee, was store bought spaghetti sauce. I use spaghetti sauce quite a bit, it is my go-to meal whenever something goes amiss or I need a night off, or I really just want to make something that all the kids will eat without fussing at me. 

When I read the ingredients on my store bought sauce, I was so disappointed in all the sugar and preservatives in it. I thought I was buying tomatoes and spices.  I felt a little bit betrayed by the Italian Grandma on the jar. (just kidding, we always buy the cheap stuff in the can!) 

So I set out to make my own spaghetti sauce and it was so easy and successful, I haven't bought the store stuff ever again. 

When I decided to try adding more veggies to the sauce, I also wanted to make it in bigger batches, so that I could put it in the freezer and have a whole bunch on hand.  You guys are going to love this. The sauce is even more amazing that my original sauce, and I stuffed so many veggies in this, and no one said a single word.  They Loved IT!! - Now spaghetti night becomes not only easy and fast, but super super good for you. Need I say, "WIN!!" 


First thing you are going to need is the recipe for my original spaghetti sauce.  Here it is. 

But I am also going to include the recipe here, so that we have it all in one convenient place. 

 Ingredients for Original Sauce:

1 tablespoon butter1 tablespoon olive oil2 cloves minced garlic1 (10 ounce) can diced tomatoes with green chilies (Ro-Tel)2 (15 ounce) cans tomato sauce2 tablespoons sugar (please adjust to your taste)1/2 teaspoon basil1/2 teaspoon oregano1/2 teaspoon black pepper1/2 teaspoon salt1 teaspoon crushed red pepper flakes (please adjust to your taste)

Ingredients to Add for Very Veggie Sauce: 

1 lb. ground beef, browned
½ small white onion, chopped
2 carrot sticks, peeled and grated

1 small zucchini, grated
1 bell pepper diced into very small cubes
10 white button mushrooms - diced small


Instructions:

In a large skillet  add both your butter and your olive oil, after that has warmed a few seconds, add the garlic and the onion and cook it for a few minutes. When they start to get really fragrant, add your ground beef and cook it until is is browned and cook all the way though. If needed, drain your ground beef and get ready to make your sauce. 

Transfer your ground beef to a large stock pot and add your cans of tomato sauce and your can of diced chilies and tomatoes. 

Then add your spices, and all your chopped veggies. It is good to prep these before hand if you are in a hurry or you can let your sauce simmer gently on the stove while you prep your veggies. 

Once you add your veggies you are going to want to simmer your sauce at least 15 minutes depending on the size of your chopped veggies. You really want them to be tender and not crunchy carrot sticks when you eat your sauce - it should all be "saucy" 


** if you are going to freeze some of this - which I highly recommend - let your sauce cool on the stove for a half hour or so, and then scoop the servings into individual freezer bags to cool down the rest of the way. They will cool much faster if they are separated.  Be sure you label your bags and put dates on them 

The sauce will keep wonderfully for 6 months in your freezer.  or up to 12 months if you have a deep freeze.  

When you are ready to use it, thaw it over night in your fridge, or if you are wanting something quick, put it in a bowl of warm water for 20 minutes and then heat up on the stove or in the microwave. 


Wednesday, January 18, 2017

Why I Love Frozen Produce


Here we are right in the middle of January. I don't know about you, but I feel like everything in my life has been frozen for a while.

I have a huge pile of frozen mittens and socks sitting by garage door, cold and soggy and waiting to be thrown into the dryer. I have milk in my garage, because I can buy 4 gallons when I am at the store and put two of them in the garage since the temperature outside hasn't been above freezing for almost 3 weeks!

I have actually been sleeping with a pair of thick fuzzy socks on because my feet are freaking frozen!

So it seems like a strange time to be talking about frozen fruits and vegetables, but it is actually the Most Perfect time.  Fresh spring and summer produce from the farmer's market has never seemed farther away. Don't you miss it? I know that I sure do in the middle of January when the sad little flavorless strawberries sit in the grocery store and cost a fortune.

Frozen fruits and vegetables are picked and packaged at the peak of their freshness and season. That means that the flavor is not only better, but the nutrition and vitamin content are higher. That means that you are getting a better - and better for you product than something that has been traveling halfway around the world.

You buy a lot of wonderful items frozen. Everything from pomegranate seeds to onions and peppers diced and put together in a package.  You can have juicy peaches and sweet young peas.

Spend some time browsing the frozen produce section of your local markets.  Although onions aren't hard to come by, I love buying them frozen mixed with peppers to add flavor and health benefits to any dish that I start with ground beef.  I love the mixed veggie mix that has carrots, peas, green beans and corn in it. My Alice and Charlie eat it almost everyday with whatever I make for lunch. They just love to eat it with their fingers. You can add a bag of frozen broccoli to any pasta dish and I have recently started buying the pre-shelled edamame and adding to Asian dishes for extra protein.

If you love smoothies, you can't beat frozen fruit and if you are a real ice cream lover, You are going to go crazy making your own "ice cream" with just frozen bananas and milk. I buy bananas when they are on super sale and if I don't have time to make banana bread (of if I peel one for Charlie and he doesn't finish it all... )  I freeze them in a ziploc and then take them out and pop them into the blender to make ice cream - you can add a dash of cocoa and make chocolate ice cream.

While it might seem like the whole world is frozen right now and that it might be a miserable thing in some ways. Frozen fruits and vegetables are amazing. And you don't even need mittens to explore your frozen food aisle -  Just stay away from the cardboard pizzas.


Friday, August 5, 2016

Easiest Apricot Freezer Jam


I used to be so afraid of making jams and jellies. I actually am still terrified of using the big boiling pot of hot water and "canning" my own. But making freezer jam is so easy, I can have the whole process done in under and hour, and then all year long I get to enjoy the delicious taste of fresh fruit.

Looks for Amazing deals at the very end of the season when the fruit is very ripe and the local farm stands are selling it cheap. You can get a lot of fruit (or veggies) for 1/2 of the cost of what it was at the beginning of the season.


And although apricots are not my favorite, I love using the jam to make savory dishes in the crock pot. Apricot jam makes an amazing base for sweet and sour chicken, bbq pork and coconut shrimp!


Ingredients:

2-1/2 cups prepared fruit (buy about 1-3/4 lb. fully ripe apricots) Scrub them well - you use the whole fruit!
2 Tbsp. fresh lemon juice
5-1/2 cups sugar, measured into separate bowl
3/4 cup water
1 box SURE-JELL Fruit Pectin

Directions:


Rinse 7 (1-cup) plastic containers and lids with boiling water. Dry thoroughly.

Pit and finely chop unpeeled apricots. (I just remove the pits and then I put them in my blender and blend them until they are liquid - I do NOT like jam with chunks!)  Measure exactly 2-1/2 cups prepared fruit into large bowl. Add lemon juice; mix well. Stir in sugar. Let stand 10 min., stirring occasionally.

Mix water and pectin in small saucepan. Bring to boil on high heat, stirring constantly. Cook and stir 1 min. Add to fruit mixture; stir 3 min. (A few sugar crystals may remain.)

Fill containers immediately to within 1/2 inch of tops. Wipe off top edges of containers; immediately cover with lids. Let stand at room temperature 24 hours. Refrigerate up to 3 weeks or freeze up to 1 year.


Monday, July 18, 2016

Quick Pickled Cherries


Ingredients:

1 heaping pint bing cherries
1 cup red wine vinegar
1 cup water
3 tablespoons balsamic vinegar
zest of one lemon
2 bay leaves
2 tablespoons sugar
1/2 teaspoon salt
1 teaspoons peppercorns
1/2 teaspoon cloves


Instructions:

Wash your cherries really well, and remove the stems. Pit them and pack them into a quart jar. 

In a medium saucepan combine the vinegars and water, zest, sugar, and spices, over medium high heat. Bring to boil and then turn down to a simmer until everything is dissolved and the brine is steamy. 

Remove from heat and set aside while the liquid cools for ten minutes. 

Then pour the liquid over the cherries and set aside until the jar is cool to the touch. 

Screw on the lid and refrigerate for several hours.


Monday, October 26, 2015

Slow Cooker Applesauce


I love apples, they are my most favorite fruit in the whole wide world. I love them every way they can be used and I love every single variety of them. I love apples. 

We ended up with almost 4 boxes of apples over a two week period and I had to find something to do with them. (the fruit flies were driving me insane!!)

I couldn't bake 20 pies, my dad dries apples by the 5 gallon buckets-full and so I decided to try and make applesauce. 

We actually use a lot of applesauce in our house. I use it a lot in my baking, and some of us like to eat it for snacks - I feed it to the little ones a lot. We use a lot of the stuff. So I figured if I could make it, we were really find ourselves in a great situation. 

Turns out you totally CAN make applesauce in a crock-pot and it is bonkers easy! 


CROCK POT APPLESAUCE 

Wash your apples super good. - Mine were from local farm stands / my tree and neighbors trees. So I didn't have to wash off a lot of wax and preservatives, but I did need to wash all the "outside" off them. 

Peel* and roughly quarter about 6 large apples or 8-9 medium size apples.

You can use any variety here but most people prefer sweeter apples like Red Delicious, Fuji, McIntosh etc…  Mixing and matching varieties is ideal.

*Most of the good stuff is located in the peel of the apple so I prefer not to peel mine.  I have a high power blender that creates a perfectly smooth and creamy applesauce. In the photos the apples were not peeled and you can see the applesauce is perfectly smooth.


Add apples to your crock pot- make sure the crock pot is at least 1/2 way full with apples.

Mix 1/3 cup apple juice or cider with 1 teaspoon cinnamon and 1 teaspoon lemon juice in a small bowl.**

Pour mixture over apples and cook on low heat for 3-4 hours.

The apples should be nice and soft.


**Here is where you can change things up to your taste.  I used apple cider but you can use water instead.  You can also add lemon peels or orange peels for a brighter flavor (remove them and toss after cooking), add 1/2 teaspoon of vanilla or add about 1/3 cup brown sugar for a nice sweet applesauce.

**You can cook this on high heat but I much prefer low heat.


Either mash with a potato masher (for chunky) or add to blender/food processor or use immersion blender until smooth.

It really is that simple.  I would say this is probably 15 minutes in total prep time between the peeling, coring and blending.


My kids really liked the way I ended up making it - with no sugar and no spiced - I wanted to be able to use it for baking and savory cooking as well and I didn't want it have too many things added to it.

I could not be happier with how it turned out!

I put it in plastic freezer containers to use when I needed - and I ended up doing every apple that I could get my hands on. This is soooo easy and tastes soooo amazing - and apples are so inexpensive in the fall, and you can keep the peels on with all that extra nutrition, and... and... and....

I think making my own applesauce has just changed my life.  me = dork


Friday, September 18, 2015

Freezing Peaches - No Sugar, No Fuss

Preserving fruits and vegetables has come a long way since the days of our Grandmas and the giant canning pots and boiling bottles, lids and rings - which eventually led to scary things in cloudy bottles in dusty basements! - No wonder most of us would rather die than do that to ourselves (am I the only one?) 

With science and tools and just a little bit of time, preserving the peak of summer bounty can be really simple - and delicious all year. 

I don't "can" things in bottles, I know lots of people who do, and they swear it is easy and not scary and super safe, but I choose not to - I don't have the supplies and it really does seem like a lot of work - Especially when canned peaches aren't that expensive and are really really good. NOT fresh peach good, but good enough for my purposes. 


I think these frozen peaches are perfect for all the uses that I need them for - Smoothies, toppings for yogurt, and baking.  I don't eat them straight once I have frozen them, my kids do - so you most certainly can (they won't have the same texture as a fresh peach - but you weren't expecting that.

Let's get started - 

You'll need peaches
Freezer bags (I used snack size so I can make smoothie serving sizes and then I put them into a big freezer bag)
a bowl of water with a couple of heavy squeezes of lemon juice

Directions:

Wash your peaches really well, scrub all the fuzz off of them by rubbing them well under the running water. (you can either leave the skin on or peel it off - I peel mine, and I just do it with a knife because all that blanching seems like a hassle to me)

Fill up a big bowl with cold water and your lemon juice.

As you Peel and Cut your peaches, put them into the water - this is the critical step to keep them from turning brown.

Some people will now put them on a cookie sheet and freeze each peach slice individually and then put them in the bags. If you have time / energy for that, go ahead - your peaches will look gorgeous.

But I just put mine in the bag - for the things I use them for - letting the bag thaw on the counter for 5 minutes separates the peaches just fine for me.


I also don't add any sugar or simple syrup to mine - I really feel strongly like that defeats the whole purpose of doing it yourself. I am not going to give any of us a lecture on how much sugar we think we need, but Peaches at the peach of the freshness and flavor don't need any added to be perfect.

Keep in mind just a few more things - Air is the enemy, squeeze as much air out of the bags as you can before you seal them up.

Use High Quality freezer bags, they are worth it.


See you in November you delicious bit of summer sunshine!