Showing posts with label snacks. Show all posts

Wednesday, July 11, 2018

Watermelon Raspberry and Lime Pops


You know those times when you buy a watermelon and it just isn't as good as you want it to be.  You don't want to waste it, but it isn't going to be delicious to just eat.  I have a solution for you - add some raspberries and lime and make popsicles!


It's a genius idea, refreshing and cold it is everything a summer treat could need to be!

The perfect way to enjoy that watermelon that you swore was going to be perfect and then turned out to be a little bit less than. 


Monday, July 9, 2018

Let's Get Popping! Some of the Best Ways to Flavor Your Favorite Whole Grain


One of my most favorite things to snack on in the whole world is popcorn. Since I love to share with you my healthy favorite things, I am going to share with you some of the most delicious ways to top this amazing whole grain.


A whopping 3 cups of air-popped popcorn is a mighty filling whole-grain snack yet only has 92 calories, plus 19 g carbs, 3 g protein, and 4 g fiber.

For the best and most even flavor distribution put half your popcorn in a bowl then sprinkle half your toppings / seasonings and then the second half of your popcorn and then top with the rest of your toppings / seasonings. I like to then put a piece of plastic wrap over the top of the bowl and shake shake shake. 

Here are some other ways that I like to top my popcorn. 

Sweet - 

Chocolate Chips ( or any flavor chips for that matter). I like the mini ones. This can get messy, but boy is it ever delicious. 

Cinnamon Sugar - used melted butter or coconut oil and then sprinkle with a cinnamon sugar mix. (most of us have one). Try pumpkin pie spice or chai spice as well and sugar and powdered ginger or nutmeg. My mouth is watering just typing this. 

Maple Butter - Mix together 1 tsp of melted butter and 1 tsp maple syrup and drizzle it over your popcorn. It is a good thing this one goes so fast, because it can get soggy. 

Marshmallow - Instead of using your regular crispy rice cereal use popcorn to make these easy treats. 

Mexican Hot Chocolate -  Toss with 1/4 teaspoon each cocoa powder and cinnamon. 

Fruit Salad- Toss with 2 tablespoons each dried cranberries, dried tart cherries, and raisins.

Pumpkin Pie -  Toss with 1 tablespoon sugar, 1/2 teaspoon cinnamon, 1/4 teaspoon ground ginger, and 1/8 teaspoon each allspice, ground cloves, and nutmeg

Caramel -  In a small saucepan, simmer 1 1/2 teaspoons olive or coconut oil and 1 1/2 tablespoons pure maple syrup. Drizzle over popcorn and toss.

Chocolate Peanut - Toss popcorn with 1 tablespoon dark chocolate chips and 1 tablespoon peanuts.

Swiss Mix - Toss with 1/4 cup mini marshmallows and 1 tablespoon hot chocolate mix.

Spiced Nut - Toss with 1 teaspoon cinnamon, 1/8 teaspoon cloves, and 1 tablespoon each sunflower seeds, pumpkin seeds, and raw unsalted slivered almonds

Agave Crunch -  Drizzle with 1 tablespoon agave nectar and toss with 2 tablespoons granola and 1/4 teaspoon cinnamon

Savory - 

Barbecue Popcorn - with brown sugar and paprika this recipe is sure to please at your house. 

Garlic Oil and Pecorino cheese - You can use any specialty cheese with this recipe. I find it just fine to omit the salt that the recipe calls for. 

Italian Seasoning - (oregano, fennel, red pepper flakes, marjoram, and basil) with olive oil.  This one tastes like Pizza Popcorn!

Parmesan Parsley - Toss with 3 tablespoons freshly grated Parmesan cheese and 1 teaspoon finely minced fresh parsley.

Truffles - Drizzle with 1 teaspoon truffle oil and 1 teaspoon olive oil and toss

Sesame - Drizzle with 1 teaspoon sesame oil and toss with 1 1/2 tablespoons gomasio (toasted sesame seeds and nori seaweed. Can’t find it in your grocery? Use 1 1/2 tablespoons sesame seeds)

Orange Rosemary - Toss with 1/2 teaspoon rosemary, 1/8 teaspoon orange zest, and 1 dash garlic powder

Vegan Cheese - Drizzle with 1 teaspoon coconut oil and toss with 1 1/2 tablespoons nutritional yeast

Lemon Pepper - Toss with 1/4 teaspoon black peppercorn and 1/8 teaspoon lemon zest

You just use almost any prepared seasoning that you have Old Bay with Lemon Pepper and butter is to die for, as well as Caribbean Jerk Seasoning. For all of us ranch fans out there, we can use a packet of Ranch Dressing mix. 

Spicy - 
Spicy Paprika - Toss with 3/4 teaspoon chili powder and 1/4 teaspoon paprika. 

Thai - Toss with 1 teaspoon each curry powder and dried basil, 1/8 teaspoon cayenne, and zest of 1 lime.

Chipotle Chocolate -  Toss with 1/2 teaspoon cocoa powder and 1/8 teaspoon chipotle seasoning.


Cajun -  In small saucepan, heat 1 teaspoon canola oil over medium heat. Stir in 1/4 teaspoon each cumin, garlic powder, dried basil, dried thyme, and paprika; 1/8 teaspoon black pepper; and 1 dash cayenne pepper. Reduce heat to low and cook for 1 minute. Drizzle over popcorn and toss.


Chili Lime -  Drizzle with 1 tablespoon extra virgin olive oil and a few shakes of Tabasco. Toss with 1 teaspoon each freshly squeezed lime juice and lime zest, 1/4 teaspoon cumin, and 1/8 teaspoon each chili powder and chili flakes

Wasabi -Toss with 1 1/2 teaspoons wasabi powder, 1 teaspoon sugar, 1/8 teaspoon cayenne, and 1 finely crumbled sheet nori.

Sweet Chili - Combine 1 1/2 teaspoons honey and 1 dash each garlic powder, chili powder, and cayenne pepper. Microwave mixture on high for 15 seconds. Drizzle over popcorn and toss with 2 tablespoons freshly grated Parmesan cheese

How can you not love a snack that you can make so many different ways and still be healthy eating it. If you can, use a mister for your butter or olive oil. (or cut it out all together). What a great way to get your daily whole grains! 

Friday, June 15, 2018

Creamy Avocado Cucumber Salad


Crunchy, creamy, tart with the juice of lime and crisp with cucumbers this salad has me loving summer. 

It marries perfectly with the feta cheese and the cilantro. 


Although there is quite a bit of lime juice in this recipe, Your avocados won't stay green forever, so it isn't really something that you can make ahead of time to enjoy later. 

But it would make an AMAZING topping for some spicy tacos or on top of a rice bowl.


I'm just eating it by the fork-full and living my dream to just eat guacamole plain. 


Monday, December 18, 2017

Pickled Red Onions


I saw these posted on the Utah Food Sense Instagram page a couple of months ago, and I knew I had to make them immediately.  They are everything promised and MORE. They go great on salads, sandwiches, burgers, as toppings for tacos or leftovers than need a little bit of OOMPH!

They take less than 10 minutes to make, so you can always have a jar in your fridge just waiting to be put on everything. You are going to love them, as much as we do. 


Friday, August 25, 2017

Simple Blender Hummus


Once upon a time, I was actually afraid to try hummus. I was really so nervous, I really am laughing at myself remembering it right now. I think my first taste of it was probably an almost invisible amount. And I remember thinking... this tastes a lot like taco seasoning. - is that a strange thought. 

Now I am an all sorts of hummus fiend.  A Fiend! I tell you. 

It makes the best spread on sandwiches instead of mayonnaise and it makes a great dip for all kinds of veggies. But at the rate that my family eats hummus, buying it for 4.00$ for a small tub gets pretty dang expensive for my family. This essentially costs me the price of a can of beans. I have bought some tahini, and it was not expensive and is frankly lasting Forever!  

If you have a fondness for hummus, I must encourage you to make your own. It is out of this world! I am a crazy food hero in my family since I make this. 


Ingredients

1 can chickpeas, drained & rinsed
2 tbsp good quality olive oil
2 tbsp good quality tahini
4 tbsp fresh lemon juice
2 small garlic cloves, chopped
1/4 cup to 1/2 cup water as required to process
1/2 tsp salt

Additional olive oil, paprika, sumac & chopped fresh mint/parsley for garnish or 1 jalapeno, chopped and seeded (optional, depending on the heat you want!

Directions

Measure out the ingredients

Place ingredients into the blender, liquid first (excluding the water)

Followed by the dry ingredients.  Add the water as you process, adding only what you need to create a creamy thick hummus.

 (if you have a high powered blender, you will need less water, if you have a more everyday use blender, you’ll want to use more.)


Monday, July 17, 2017

Quick Fridge Pickles with Spices and Garlic


I didn't know whether I should start this blog post out talking about how pickles make every single food better, or by telling you about how much I love finding unexpected things at the Farmers' Market and coming home and doing something amazing with them. 

Which One?  

Farmers' Market, since it is the season. I love going to the markets or the farm stand and seeing what is for sale this week. In my CSA box we got these huge cucumbers - really short fat ones. And all I could see were the giant pickles in the huge jars that you buy.  I wanted to make some so badly. 

I love to take my kids with me and let the browse and pick things out. They are always excited to try what they chose and sometimes they pick out things that I haven't tried either. 


Second, Pickles, Man! do I ever LOVE pickles!

I may own some kind of strange record for blog with the most pickle recipes. They go great on sandwiches, added to salads, to eat plain as a salty snack or for those strange late night, "what's in the fridge" moments. They are a summer staple for lots of people, going on burgers and hot dogs, being chopped and put into potato and macaroni salad - there is even a Dill Pickle Macaroni Salad!

Pickles for President!


If you are hesitant to make your pickles at home because you afraid (or don't want the mess of using a big pot to can and making 20 bottles of pickles) These pickles are just perfect for you. They make very small batches, you don't have to buy a ton of cucumbers and you can eat them all in plenty of time that they won't take up room in your fridge for too long. (although, We Always have a zillion jars of pickles in our fridge *really, a zillion)


Ingredients

2 pounds Kirby cucumbers
1 1/2 cups apple cider vinegar
1 1/2 cups water
2 tablespoons pickling salt
6 garlic cloves, peeled (2 per jar)
1/4 teaspoon crushed red pepper per jar (3/4 teaspoons total)
1 teaspoon dill seed per jar (3 teaspoons total)
1/2 teaspoon black peppercorns per jar (1 1/2 teaspoons total)


Directions

Wash and slice the cucumbers.

In a large saucepan, combine vinegar, water and salt. Bring to a simmer.

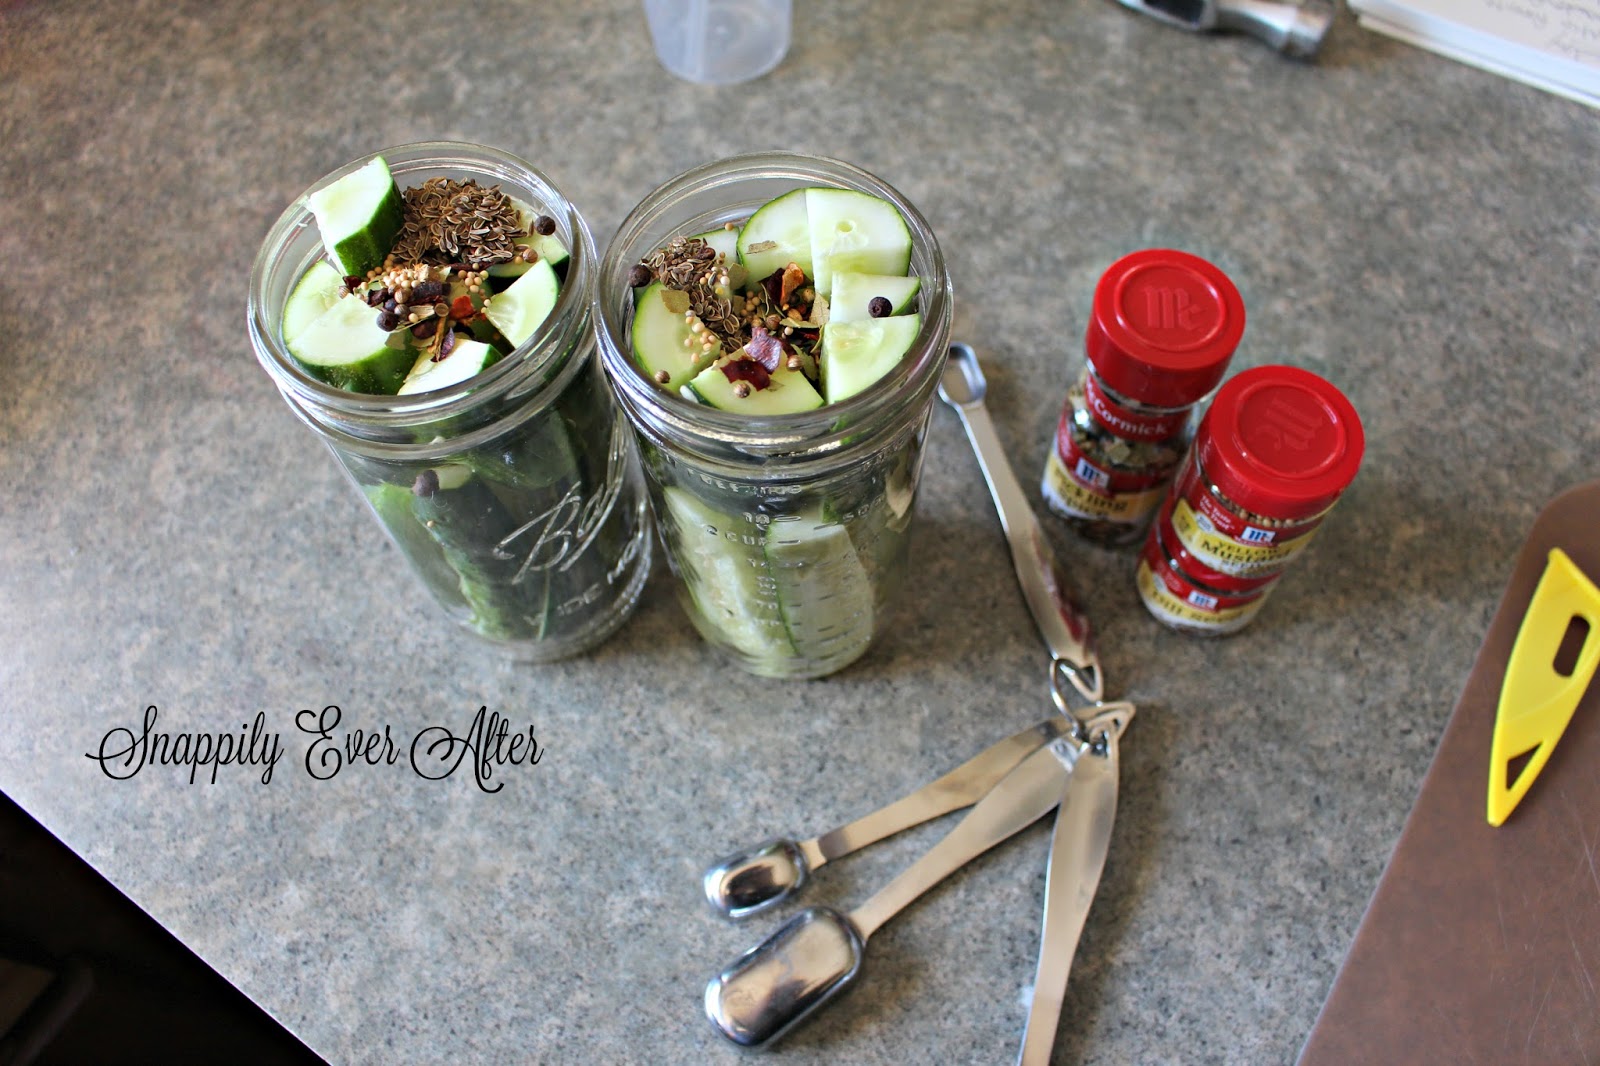
Arrange jars on counter and dole out the spices to each. Pack the cucumber slices firmly into the jars. You don't want to damage the cucumbers, but you do want them packed tight.

Pour the brine into the jar, leaving approximately ½ inch head space.

Tap jars gently on counter top to dislodge any trapped air bubbles.

Apply lids and let jars cool. When they've returned to room temperature, place jars in refrigerator. 

Let them sit for at least 48 hours before eating


Monday, June 19, 2017

Chewy Orange Granola Bars


I love making my own granola bars at home. They are so much easier than you might think and you can complete control of what ingredients go into them. No fillers, less sugar than the manufactured kind and you can make them exactly how you like them. 


For example, I really don't like walnuts, so I used slivered almonds (that I didn't have enough of, so I chopped up some cashews that I did have)

I also can cut the bars into larger sizes for my husband and the older boys and into much smaller ones for my 3 and 5 yr olds. 


If you are hesitant to try this recipe because it seems a bit different. I had never had orange granola bars either. Give it a try, they are amazing. Everyone who has tried them has asked for the recipe. 

Next time I make them, I am going to add dried cranberries, since orange and cranberry is such a classic combination.  


Ingredients:
4 cups quick-cooking oats
1 cup packed brown sugar
1 teaspoon salt
1-1/2 cups chopped walnuts
1 cup flaked coconut
3/4 cup unsalted butter, melted
3/4 cup orange marmalade

Instructions:
Preheat oven to 350° F.

In a large bowl, mix together oats, brown sugar, salt, walnuts, and flaked coconut.

Stir melted butter and orange marmalade into dry ingredients; mix thoroughly.

Spread oats mixture into greased half-sheet pan.  Bake for 15-20 minutes, or until edges are lightly browned.

Let cool for a few minutes, then cut into bars.  Store in airtight container. I wrap mine individually in plastic wrap and them put them into a large plastic zip bag and put them in the fridge. 


Wednesday, June 14, 2017

Strawberry Green Smoothie


My family just can't get enough of these Green Smoothies or Popeye Smoothies are you sometimes here them called. I have been making them thick to be like shakes and thin to be like smoothies. 

They are perfect for the hot weather that we are having as a quick nutritious cool down or for a healthy afternoon snack. Lots of people enjoy them for breakfast, but at our house, that means I would have to run the blender while the littlest ones were still sleeping - and you know that isn't happening. 


I am getting much better at mixing flavors and even venturing out onto my own. I haven't gotten brave enough to just start throwing anything in, but perhaps we'll get there soon. 

I am also learning lots of basic steps, like a banana will sweeten it, and also make it creamier. If you use frozen fruits, you will need a lot less ice. And a huge tip that I have learned is that fruit juice in them, doesn't really do much. You can add water and save yourself the sugar and the calories. 


Ingredients:

1 ripe banana
4 large strawberries (I used frozen)
1 cup low-fat yogurt
1 handful spinach
(water and ice to desired consistency)


Directions:

Add all of your ingredients to your blender. 

The more ripe that your banana is, the less you will have to sweeten your smoothie. 

Blend all of your ingredients together. 

You can add in a little water and/or ice to get the consistency you prefer. 

The ice will thicken it a bit and make it colder, of course.


Friday, March 17, 2017

Power Packed Fruit and Veggie Muffins


I have been wanting to make these muffins for a while, but Let's be honest, you have to work up a certain amount of bravery to put broccoli in a blender and then add it to a muffin. 

Turns out there was nothing to be afraid of!  These were so delicious.  I doubled the recipe when I made it, because so many of the ingredients called for a half of this, or a half of that. My kids ate the first 18 muffins right when they came out of the oven. Joseph was so impressed he took a plate over to his parent's house and the next day was Sunday, and that finished them up. 36 muffins in a day and a half. That has GOT to be a new record, even for us. 


I am going to post this recipe a bit different. I am going to list all the ingredients here - and then walk you through some photos of me making the muffins.  Then add the end, I'll post the recipe with ingredients and instructions in its entirety. That way, you can see my blender broccoli and not be totally freaked out when you see yours. 


Ingredients : 
1 cup flour, whole wheat
1 cup flour, all-purpose
3/4 teaspoon baking soda
1/2 teaspoon salt
1/4 teaspoon nutmeg
1/4 teaspoon cinnamon
1/2 cup sugar
4 tablespoon butter, unsalted
2 large eggs
1 teaspoon vanilla extract
1/2 cup broccoli, florets
1 medium zucchini
1 1/2 medium carrot
1/2 medium apple
1 medium banana
1/8 cup apple juice
1/4 cup applesauce, unsweetened
1/4 cup yogurt, plain


I started out by getting all my ingredients out on the counter. I like to bake this way, instead of getting each one out as I need it. I shredded my carrots with my tiniest shredder and I peeled the zucchini before I shredded it.


Next it was time to mix the dry ingredients together. I did this in my largest bowl, since this is the place that everything gets added to at the end.  I also always mix my dry ingredients together. I think it is really important to mix all the spices evenly through the flour mixture and also to get you baking agents like soda or powder to be evenly distributed so your muffins will rise equally. 


This is my sugar, eggs, vanilla and butter. I used a hand mixer for this because I think it really makes a difference in the texture of the eggs and butter to have them beaten light and bubbly. Be sure your butter is nice and soft - get is as soft as you can without getting it too melty. It is important as part of the liquid balance in the muffins. 


For those of you that make Popeye Smoothies this is probably a totally normal sight. But I was prepared to completely grossed out by it. Actually it just smelled like apples and tasted like banana. And the only sign there was broccoli was in it was the tiny little flowers that looked like dots. If you ask me, that is lots less scary that strips of unpeeled zucchini.  I decided this was nothing that I should have been worried about at all. 

You add your blender to your wet ingredients, stir and then add those wet ingredients to your dry. Stir just until incorporated and bake. 

Ready for the recipe? 
 

Ingredients :
1 cup flour, whole wheat
1 cup flour, all-purpose
3/4 teaspoon baking soda
1/2 teaspoon salt
1/4 teaspoon nutmeg
1/4 teaspoon cinnamon

1/2 cup sugar
4 tablespoon butter, unsalted
2 large egg
1 teaspoon vanilla extract

1/2 cup broccoli, florets
1 medium zucchini
1 1/2 medium carrot
1/2 medium apple
1 medium banana
1/8 cup apple juice
1/4 cup applesauce, unsweetened
1/4 cup yogurt, plain


Instructions:

Preheat oven to 350 degrees F.

In a large bowl, mix together flours, baking soda, salt, nutmeg, and cinnamon. Set aside.

Soften butter. (remember, soft, but not melty)

In a smaller bowl, with your hand mixer (or your strong arms) mix the sugar, butter, eggs and vanilla.
Beat well.

In a food processor, combine steamed broccoli, zucchini, apple, banana, apple juice, and applesauce.

Pulse until thoroughly mixed. (Don't make it a smoothie - just so it is all "smooth" that makes no sense until you try it)

Shred carrots.  If you don’t want the shreds in your muffin, combine your carrots with the rest of the fruits and veggies in the food processor. I added my carrots to the wet mixture so they would stay in shreds, my kids are really familiar with carrots in muffins (and cake) so it was very normal to them, if your kids might be timid, go ahead and blend them.

Combine the fruit and veggies, carrots, and yogurt, into the wet ingredient mixture sugar/butter/eggs) and beat until mixed.

Finally, add the dry ingredients and mix just until combined and wet.

In a muffin tin, place muffin papers or spray with cooking spray.

Scoop the mixture into a prepared muffin pan.  Fill each spot about 3/4 of the way full.

** For mini muffins: Bake in a 350 oven for 15-20 minutes for mini-muffins

**For regular size muffins: Bake in a 375 degree oven for about 20-25 minutes.

Bake until the tops are slightly brown and a toothpick comes out clean or they bounce back when you touch them with your finger.

Wednesday, June 15, 2016

How to Cook Amazing Artichokes

Artichokes can be such an intimidating spring vegetable. If you’ve never cooked a whole artichoke before, you might feel a little bit daunted. Don't be afraid of them. They are extrememly simple to cook. And I think perhaps the best part about eating them is that it is very social.

So cook some up, sit down with your family and have a nice long visit over a couple of artichokes.


Fun fact: artichokes are actually part of the sunflower family. They make a pretty, edible ornamental in your spring garden.

You can also look for them at farmer’s markets or in your spring CSA basket. They’re also rich in potassium, which supports heart health and may reduce your risk of stroke. Artichokes also have antioxidants that help support your immune system and can help protect you fellas from prostate cancer.


Cooking Whole Artichokes (and how to eat them!)
Ingredients (Makes 1 artichoke. You’ll want to prepare one per person.)


1 whole artichoke
water
2 tablespoons of  seasoned breadcrumbs
2 tablespoons vinaigrette


Directions

1. Chop about 1/2″ of the pointy top off of the artichoke, then gently stuff the breadcrumbs in between the leaves.

2. Place a steamer basket into the bottom of a large pot with enough water to reach almost to the base of the basket, but not so much that the artichokes are sitting in any water. Bring the water to a boil, then place the artichokes into the pot.

3. Cover and steam for 30-40 minutes, adding a bit more water, if necessary. Your artichokes are done when the outer leaves are tender and pull away easily. The range of cooking times is broad, because it depends on the size of your artichoke and how tender it was to begin with. Just keep checking until it’s ready!

4. Serve with vinaigrette on the side for dipping.


When I was a growing up my mom would steam whole artichokes for us like this in the springtime, and it was one of our favorite meals! Eating a whole artichoke is more than just supper: it’s an activity.

Artichokes have woody outer leaves that get more tender as you make your way into the center. Even the woodiest leaves have some goods on them, though, so don’t discard them once they’re steamed! Pops served our artichokes with vinaigrette on the side. Dip the tender bottom of the leaf into the dressing, then use your teeth to scrape away the fleshy part. You can collect the leftover leaves for composting after supper.

Once you’ve peeled most of the leaves, you’ll find the hairy choke. Slice the hairy part away, and what’s left is the best part of the artichoke: the heart. We would dig into the heart with a knife and fork, and it’s heavenly.