Showing posts with label fun food. Show all posts

Wednesday, July 25, 2018

Peanut Butter Banana Bites


You can make this snack early in the day and freeze it, or you can make them and server them right away.  

I also have had the kids help me and make them - and I have made them for the kids. 

We have topped them with nuts, dried fruit, cereal and trail mix! - This recipe is too easy and too delicious not to share with you. 


You can use almond butter or sunflower nut butter, but I feel like those butters are thinner and if you want to use one of them, I like the method of rolling the banana in the nuts with the butters spread on the outside. 


Monday, July 2, 2018

Beet and Bean Dip - Ginger Beet Hummus


Isn't that just gorgeous? Don't you want to just dive in? 

Beets are one of my most favorite foods in whole wide world. I love them anyway that I can get them. so making them into a delicious dip was a given for me. 

When I made this dip and set out the rainbow of veggies my kids came flocking to it. They all ate it and loved it. The flavors of the hummus (tahini, cumin and ginger) really balance out the earthy flavors of the beets. Its so yummy on everything!


I have a really detailed tutorial for you on roasting beets at home - without making a huge beet juice mess all over your kitchen.  Its Here!  

You can also buy beets pre-roasted, but with farmer's markets in full swing - there are LOTS of beets available and you can eat the greens - and you can roast a bunch, freeze some for later, keep some in your fridge for salads and make this yummy dip!


If you love this dip, don't be limited by just dipping veggies, chips and pita, you can spread it on sandwiches, you can use it in wraps and you can add it to Buddha bowls, rice bowls and veggie bowls. YUM! 


Monday, July 31, 2017

Watermelon Frozen Yogurt Bark


I love fun food. I guess to my brain, food that looks cute just tastes better. 

I don't know if that is really true, but it is awfully fun to make, and I love being the mom that says, Who wants Frozen Yogurt and then bringing this outside and letting them be amazed at all the colors and textures and tastes. 

Food should be fun, don't you think?


You'll want to make this the day before you want to serve it. Depending on how cold your freezer is and how thin you make the bark, you might be able to get away with making it in the morning to serve in the afternoon, but I wouldn't risk it the first time.  I always like my first time making something to be a low-key test without too much pressure - otherwise if it fails, I am really crushed emotionally. 


Here are the ingredients that you'll need - parchment paper or non-stick foil (something that you can lift out),  a round pan (a cake pan or a pie pan work great), yogurt in a flavor you like, I used vanilla and colored it with food coloring, so you'll need food coloring, 2 plastic zip bags and mini chocolate chips. 

Color your yogurt and put it into 2 separate plastic bags.


Use your green first, snip off a corner of the bag and pipe around the edge of your circle. 


Then snip off the corner of the pink bag and pipe that into the center of the green. 


I am a terrible mess maker and so then I needed to go back with a small spatula and smooth out my messy piping job. It looked much nice after that. 


 After that, sprinkle some mini chocolate chips in the center and then put it in your freezer - laying it as flat as you can. 


When you are ready to serve it, take it out about 5 minutes before you are wanting to serve. Remove the foil or parchment from the pan and let it sit on your counter. 

When you are ready to serve it, cut it into watermelon slices. 

Fair Warning - this is pretty messy.  My 14 year old said, "this is like holding a scoop of ice cream in your hand"  I served it outside on a hot day while we were playing in the sprinkler. So the mess didn't bother anyone at all. And the heat may have had a lot to do with how fast it was melting. 

But how fun is this? Icy frozen treats, shaped like a watermelon, that taste like vanilla and has chocolate chips "seeds" I love everything about this. 


Wednesday, July 26, 2017

Frozen Sour Candy Grapes


I feel a lot lately that I am always packing snacks. Packing snacks for the pool, packing snacks for the fireworks, packing snacks for the summer festival or a day at the beach. Snacks, Snacks, Snacks!

And it has been hard for us to get out of the habit of going to the store and raiding the aisle with all the sugar and chocolate and chips. Those are hard habits to get out of, especially when you want to relive old memories as much as you want to make new ones. 


So as we are trying to eat better and be healthier, I am trying to pack snacks that are better for us. And as much as my kids really love the veggies and fruit that I pack, sometimes I miss having the things for them that I think are "fun"  * I am the worst one here at our house about letting go of old habits

Alice and I made these fun frozen sour grapes for a day of fun at the little festival that celebrates the little town that I grew up in. It is a hot busy day and these frozen grapes were as delicious and refreshing as they were fun to make and eat. 


Here are out ingredients.  We used red grapes that we had washed, dried and picked off the stems. 

Then we used Elsa J-ello, because why would you not use Elsa j-ello,  if they had Little Mermaid j-ello, we probably would have used that instead. The lime is pretty good, but honestly the flavor doesn't matter all that much. 

And a few drops of lime or lemon juice. We used lime because it was what we had, but you can use lemon and you can use fresh if you have it as well, we just didn't. 


I let Alice make these all by herself and she did a great job. Charlie even came and helped and was successful at it without making too much of a mess. So I would say these are perfect for a 5yr old to make themselves once you get everything set up and show them how - a 2 yr old can make them, but you're going to have a mess to clean up. 


I set up three little stations for here. I put just a few drops of lime juice in the bottom of the bowl, really just a few drops, less than a teaspoon. You can to just barely wet the grapes. 

Then she rolled them all around in the j-ello and then put them on the plate. 

I didn't even have to let them "set-up" once she was done rolling, I put them all back into the zip plastic bag and put that right in the freezer. 

They are so good and really fun.  I really like frozen grapes anyway, but this made them a little bit special and honestly it didn't make me feel like my kids were "missing out" because I want them to eat healthy snacks. 


Friday, July 21, 2017

Spicy Chipotle Kale Chips


These Kale Chips have been so fun to make. My older boys love the spicy flavor and the kick. When I make them, they appear from the basement and start asking what smells so good. 

If you are wondering if you can introduce Kale to your family, making these chips is a great way to do it. A bonus for me, is that the spicy flavor masks a bit of the bitterness that Kale can have. 


I have learned a couple tips in making Kale chips. 

First make sure the leaves are really really dry. Once I got it out of my head that Kale didn't need to be handled gently like some greens - we got a long much better. Once they are washed really well, go ahead and try them really well while I am removing the stems. 

I make sure I am making the pieces "chip" size. These can be very crumbly, you can't really "take a bite" of one, you just put the whole thing your mouth, so you need to make them mouth size. 


 Once I get all the leaves washed, dried and in a big bowl, I add the olive oil.  I don't add any spices yet.  I start with adding about half the oil the recipe calls for and then I start massaging it into the leaves. 

*How does one "Massage" kale you ask --  Grab, Scrunch, Release - Grab, Scrunch, Release. 

I almost always can get away with adding less oil than I think I need, and that means a lighter chip that is less greasy. 

Then I add my spices and give it one more toss. I don't season on the sheet pans, I think it doesn't coat them evenly. 


Ingredients:

1 bunch of kale, washed and dried really well
2 tsp of olive oil
¼ tsp chipotle chili powder
½ tsp garlic powder
Salt and pepper


Directions:

Preheat oven to 350F.

Prepare the kale by removing the stem from each kale leaf. Rip the leaves into small pieces.

Place in a large bowl, toss with olive oil, chili pepper, garlic powder, salt and black pepper.

Massage the leaves very well for about 1 minute or until all the leaves are coated.

Spread kale on two baking sheets, but make sure they are in one single layer to avoid the leaves steaming rather than baking.

Remove from the oven after fifteen minutes or until they are crispy and crunchy.


Monday, June 19, 2017

Chewy Orange Granola Bars


I love making my own granola bars at home. They are so much easier than you might think and you can complete control of what ingredients go into them. No fillers, less sugar than the manufactured kind and you can make them exactly how you like them. 


For example, I really don't like walnuts, so I used slivered almonds (that I didn't have enough of, so I chopped up some cashews that I did have)

I also can cut the bars into larger sizes for my husband and the older boys and into much smaller ones for my 3 and 5 yr olds. 


If you are hesitant to try this recipe because it seems a bit different. I had never had orange granola bars either. Give it a try, they are amazing. Everyone who has tried them has asked for the recipe. 

Next time I make them, I am going to add dried cranberries, since orange and cranberry is such a classic combination.  


Ingredients:
4 cups quick-cooking oats
1 cup packed brown sugar
1 teaspoon salt
1-1/2 cups chopped walnuts
1 cup flaked coconut
3/4 cup unsalted butter, melted
3/4 cup orange marmalade

Instructions:
Preheat oven to 350° F.

In a large bowl, mix together oats, brown sugar, salt, walnuts, and flaked coconut.

Stir melted butter and orange marmalade into dry ingredients; mix thoroughly.

Spread oats mixture into greased half-sheet pan.  Bake for 15-20 minutes, or until edges are lightly browned.

Let cool for a few minutes, then cut into bars.  Store in airtight container. I wrap mine individually in plastic wrap and them put them into a large plastic zip bag and put them in the fridge. 


Wednesday, May 24, 2017

Chewy Coconut Trail Mix


I love mixes that start with cereals. I think there is a huge opportunity here to get some healthy stuff in your family without them realizing it. 


This original recipe used to get delivered to my family growing up and it was a coveted Christmas treat. My sister loves it more than anything. When I started making it, I found out it was a great way to pack a lot of whole grains into a mix that my kids loved eating. 

Read your labels and buy the best cereals that you can. Whole wheat does not mean whole grain, so double check your ingredients.


You can also add lots more nuts, dried fruit or really bulk up the bran cereal and cut the caramel glaze in half. There is a ton of room for making this recipe your own. 


Ingredients:

6 1/2 cups Rice Chex ( I use a mix of chex here, because I had it - and the bran chex are my favorite thing in the world)
4 1/2 cups Golden Grahams
1 cup sliced almonds ( you can also use any nuts that you would like, I really like almonds, so I used them)
2 cups unsweetened coconut
3/4 cup (1 1/2 sticks) butter
1 cup sugar
1 cup light Karo syrup
1 teaspoon vanilla
1/2 teaspoon almond extract


Instructions : 

In a VERY large bowl combine cereals, almonds, and coconut. Set aside. You combine them first because it is best to have your dry ingredients well incorporated before you start to make them all chewy together.

In a large saucepan, combine butter, Karo syrup, and sugar.

Bring to a boil, then reduce heat and cook for 3 minutes.

Remove from heat and stir in the vanilla and almond extract.

While the mixture is still hot, pour over the cereal mixture and stir well so the caramel mixture coats the cereal.

Then spread it out on a lined cookie sheet, or a sheet pan with a silicone liner, Let cool.

Serve in a large bowl or divide into individual portions.

Wednesday, May 17, 2017

French Dip Pinwheels with Caramelized Onions


Who doesn't love hot roast beef and melty cheese with a dippy savory sauce? 
That's right, exactly nobody. 


This recipe is basically about assembling really common ingredients in a new way. 
If you don't want to make the dough, you can use frozen rolls or even dough in a tube.
But the pizza crust is so easy to make and tastes so much better, that I highly recommend that you do it. 


Ingredients:

1 Prepared recipe of Pizza Dough (there are two copies of this recipe One Here and One Here
    ** This is the same Food Sense recipe, but you get two different sets of instructions on how to make it. 

Filling:
5 ounces deli roast beef
8-10 slices provolone cheese

Caramelized Onions:
1 teaspoon olive oil
1/2 medium onion, diced (about 1/2 cup)
1 clove garlic, minced

Au Jus:
2 cups beef stock (I like using low-sodium)
2 tablespoons Worcestershire sauce
2 teaspoons soy sauce
2 beef bullion cubes, optional but adds great flavor
Salt and pepper, to taste


Directions:

Preheat oven to 375°F. Line a cookie sheet with parchment paper or a silicone baking mat.

Roll out your dough into a long rectangle. Leave 1″ at either and and cover with a layer of roast beef and a layer of cheese.

Begin at one side and roll the dough up, when you get it all rolled up pinch the end to seal. 

Slice into equal size rolls and place on cookie sheet. Bake for 15-22 minutes, depending on size, until the dough is cooked through.


While the rolls are baking, make the caramelized onions and au jus. 

Heat oil in a medium saucepan over medium heat. Add onion and cook about 3-4 minutes, until semi-translucent, then add the garlic and cook 1 minute more. Season with salt and pepper and cook longer until they reach your desired level of "doneness".  I like mine really cooked down, so that's what you see here. 

In a separate small saucepan heat the beef stock, Worcestershire, soy sauce, and bullion cubes, if using. Bring to a boil and cook for 4-5 minutes boiling (or until the bullion is dissolved). 

Taste carefully because it will be very hot, and add salt and pepper as desired.

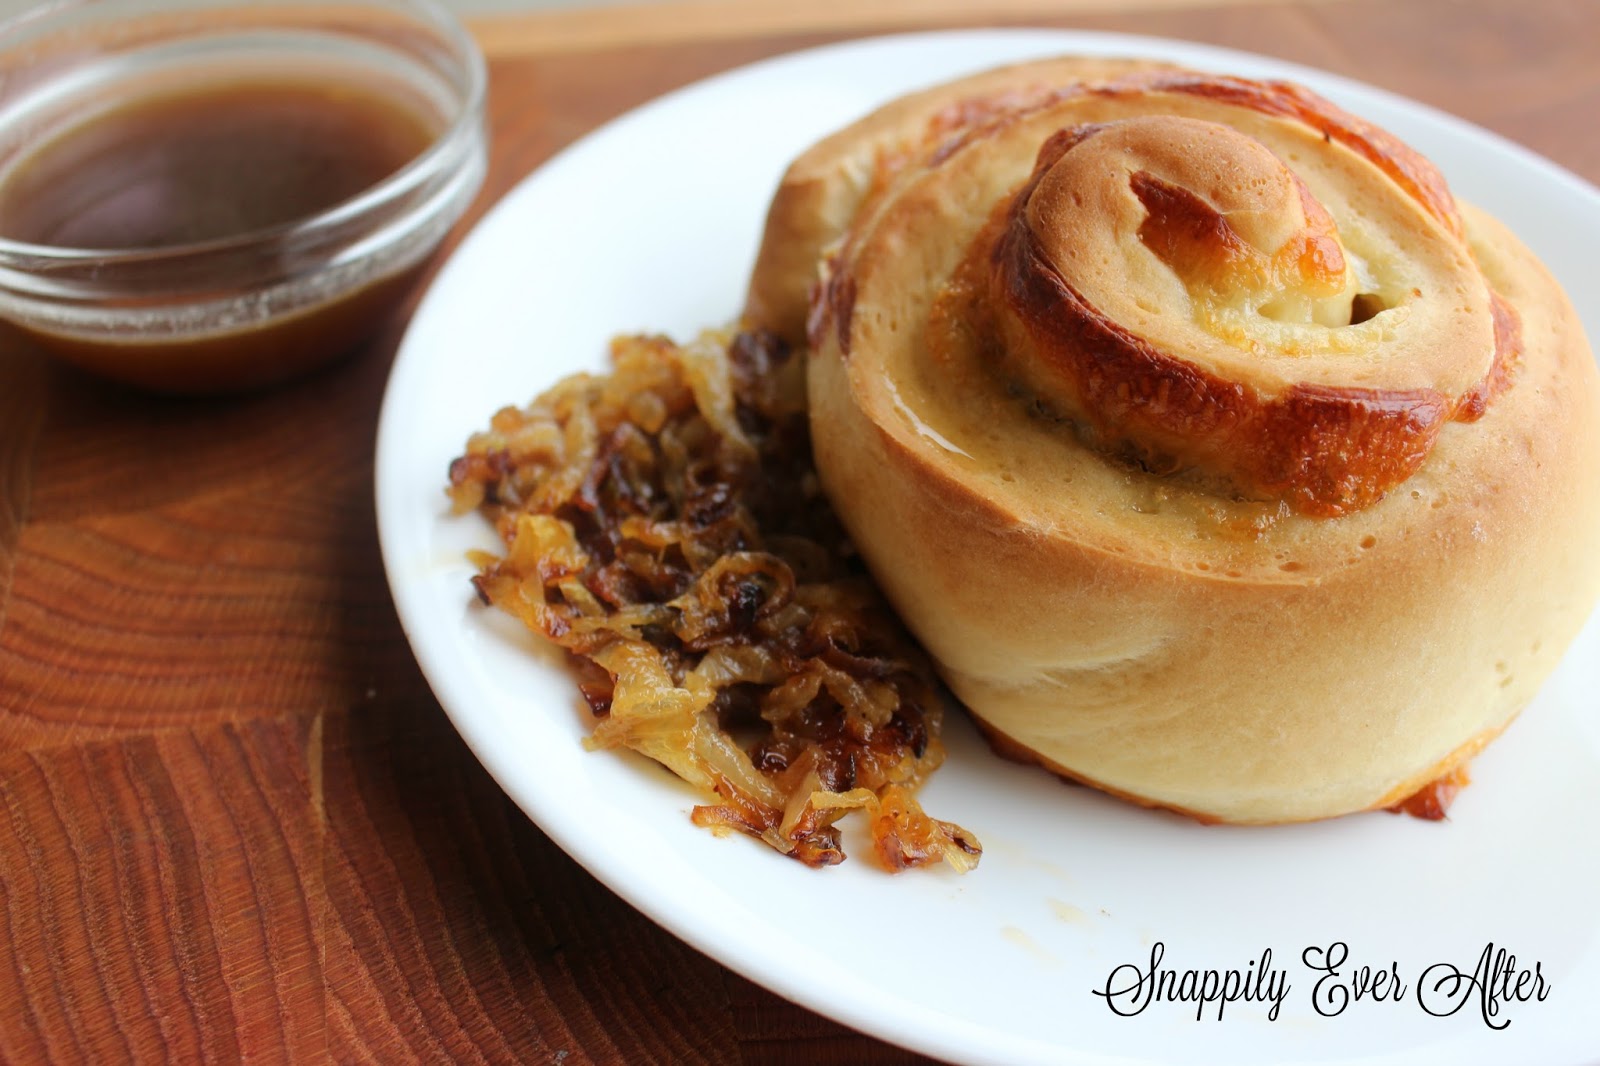
Serve hot rolls with the au jus and onions.