Showing posts with label Dairy. Show all posts

Friday, March 23, 2018

Healthy Clam Chowder


In my mind creamy Clam Chowder has also seemed to be one of the most indulgent soups you can eat. I imagined it to be full of heavy fats and sodium and that making a good for you version was basically going to amount to flavorless seafood in a bowl of skim milk. I couldn't have been more wrong. 


This soup is creamy while still being really good for you. I added extra potatoes, carrots and celery to bump up the amount of veggies in it and cut down on the bacon to just a sprinkle. (it really doesn't need it)


Our local seafood counter didn't have fresh clams, so we used the canned ones and it wasn't a problem at all. It did take a while at the grocery store to find the clam juice since I was sure it was buy the tuna fish and canned seafood and the store clerk was sure it was on the juice aisle. (NOT on the juice aisle people!)  Be sure that you read the label for sodium, you don't need it for taste or flavor and lots of brands add a ton to theirs. We had no trouble finding one that didn't have any sodium added. 


Monday, July 31, 2017

Watermelon Frozen Yogurt Bark


I love fun food. I guess to my brain, food that looks cute just tastes better. 

I don't know if that is really true, but it is awfully fun to make, and I love being the mom that says, Who wants Frozen Yogurt and then bringing this outside and letting them be amazed at all the colors and textures and tastes. 

Food should be fun, don't you think?


You'll want to make this the day before you want to serve it. Depending on how cold your freezer is and how thin you make the bark, you might be able to get away with making it in the morning to serve in the afternoon, but I wouldn't risk it the first time.  I always like my first time making something to be a low-key test without too much pressure - otherwise if it fails, I am really crushed emotionally. 


Here are the ingredients that you'll need - parchment paper or non-stick foil (something that you can lift out),  a round pan (a cake pan or a pie pan work great), yogurt in a flavor you like, I used vanilla and colored it with food coloring, so you'll need food coloring, 2 plastic zip bags and mini chocolate chips. 

Color your yogurt and put it into 2 separate plastic bags.


Use your green first, snip off a corner of the bag and pipe around the edge of your circle. 


Then snip off the corner of the pink bag and pipe that into the center of the green. 


I am a terrible mess maker and so then I needed to go back with a small spatula and smooth out my messy piping job. It looked much nice after that. 


 After that, sprinkle some mini chocolate chips in the center and then put it in your freezer - laying it as flat as you can. 


When you are ready to serve it, take it out about 5 minutes before you are wanting to serve. Remove the foil or parchment from the pan and let it sit on your counter. 

When you are ready to serve it, cut it into watermelon slices. 

Fair Warning - this is pretty messy.  My 14 year old said, "this is like holding a scoop of ice cream in your hand"  I served it outside on a hot day while we were playing in the sprinkler. So the mess didn't bother anyone at all. And the heat may have had a lot to do with how fast it was melting. 

But how fun is this? Icy frozen treats, shaped like a watermelon, that taste like vanilla and has chocolate chips "seeds" I love everything about this. 


Wednesday, June 14, 2017

Strawberry Green Smoothie


My family just can't get enough of these Green Smoothies or Popeye Smoothies are you sometimes here them called. I have been making them thick to be like shakes and thin to be like smoothies. 

They are perfect for the hot weather that we are having as a quick nutritious cool down or for a healthy afternoon snack. Lots of people enjoy them for breakfast, but at our house, that means I would have to run the blender while the littlest ones were still sleeping - and you know that isn't happening. 


I am getting much better at mixing flavors and even venturing out onto my own. I haven't gotten brave enough to just start throwing anything in, but perhaps we'll get there soon. 

I am also learning lots of basic steps, like a banana will sweeten it, and also make it creamier. If you use frozen fruits, you will need a lot less ice. And a huge tip that I have learned is that fruit juice in them, doesn't really do much. You can add water and save yourself the sugar and the calories. 


Ingredients:

1 ripe banana
4 large strawberries (I used frozen)
1 cup low-fat yogurt
1 handful spinach
(water and ice to desired consistency)


Directions:

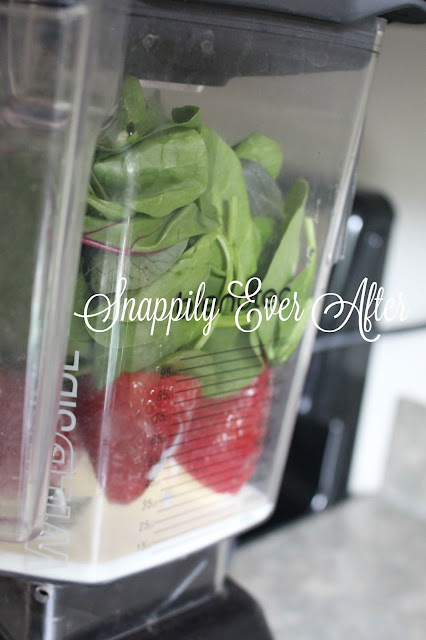
Add all of your ingredients to your blender. 

The more ripe that your banana is, the less you will have to sweeten your smoothie. 

Blend all of your ingredients together. 

You can add in a little water and/or ice to get the consistency you prefer. 

The ice will thicken it a bit and make it colder, of course.


Saturday, August 20, 2016

Raspberry Honey Butter


Because I live a skip from a restaurant that is pretty famous for serving raspberry honey butter, my kids are hooked on the stuff - that means, if we have raspberries, we are making honey butter. 


Ingredients:
1/2 cup butter, softened (not melted)
1/2 cup raspberries that have been smashed with a fork
1/2 cup honey
1 teaspoon vanilla

Directions:

(I made mine using my hand mixer. You could also use a KitchenAid mixer or another large / stand mixer.  If you don’t have any of those, you can just use your own arm power and beat it by hand, but I will warn you- your arm will be tired!)

Add butter to large bowl and beat until soft and creamy. 

While the mixer is still mixing the butter, add in the mashed raspberries, honey, and vanilla. 

Beat until all mixed together and creamy (like the consistency of a soft butter); about 8 minutes.

Serve over warm bread or toast.
Store leftovers in the fridge in a sealed container.


Friday, July 8, 2016

Cheese Toast with Skillet Veggies


Meals don't have to be complicated to be really delicious.  We are huge fans of cheese toast here are out house - and I saw a recipe that had topped some crusty bread with veggies and it looked like something I had to make immediately. 


It was so delicious, and it came together in under 10 minutes from start to completely finished. I bet that lots of different combinations will work, so we'll be experimenting lots over the summer as the veggies come on. 


Ingredients: 

1 loaf of yummy crusty bread (preferably whole grain)

2 TB Olive Oil
6 oz (1/2) package of sliced mushrooms
Sliced carrots, 
zuchinni
yellow squash
yellow onion
bell peppers cut into strips

4 oz Chevre goat cheese or other spreadable cheese - Cream Cheese or Neufchatel cheese would work great. 


Directions: 

Cut your bread into slices. This was a round loaf so I cut it into half and then cut the half into slices, so the pieces wouldn't be so huge. 


Then I toasted them under the broiler. I did them this way, so I could do them all at once, and also because some were too big to fit into the toaster, If you were making smaller serving sizes, using a toaster would work great for this part. 


Spread the soft cheese on the individual pieces of toast. 


For the Veggies: 

In a large skillet heat the oil over medium high heat. Add the mushrooms, onions, zucchini and squash (all your veggies). Cook and stir for 2-3 minutes until the veggies begin to brown. At this point, add a few TB of water and reduce the heat to medium and cover the skillet until the veggies soften. 


As soon as your veggies reach your desired amount of crispness, spoon them on to the pieces of toast with cheese spread on them.    YUM!! 


Monday, June 6, 2016

Artichoke Salad


This is a great salad recipe for potlucks. It is a bit different that perhaps people are used to seeing, but the familiar ingredients will be sure to draw them in. You are going to love it - and you are going to love sharing it. 


Ingredients:

1 (.7 ounce) packagedry Italian-style salad dressing mix
1 cup low fat sour cream
4 cups chopped romaine lettuce
1 cup chopped red bell pepper
1 cup chopped broccoli
1 cup sliced fresh mushrooms
1/4 cup diced onion
1 (14 ounce) can artichoke hearts, drained and chopped


Instructions:

In a small bowl, whisk together the sour cream and Italian dressing mix.

In a large bowl, toss together the lettuce, red pepper, broccoli, mushrooms, onion and artichoke hearts. 

Top with dressing and toss until evenly coated. Refrigerate until ready to serve.


Tuesday, July 21, 2015

Raspberries and Cream - Create a Fruity Dessert


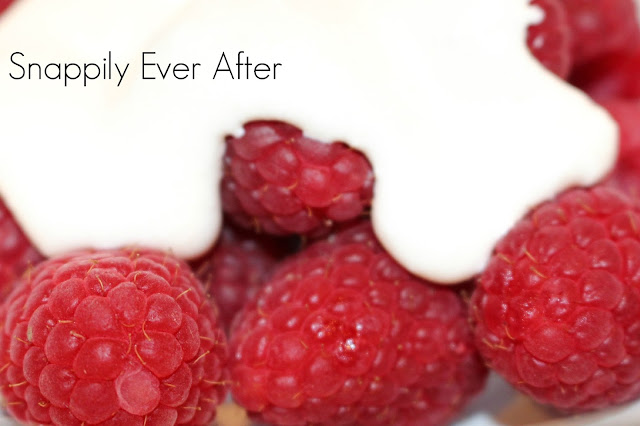
Berries are cream have got to be one of the most delicious foods in the whole wide world. There is something about the berries at the peak of the season ready to just burst with flavor topped with sweet cream - Oh good golly!!  I don't think that food was meant to be any better than this. 

I don't stess too much about saturated fight and high calories when I am eating this. The berries are only this good for such a short time each year. (Plus I rarely get an entire bowl to myself around here)

But if you are concerned about those things... and A lot of you are, here is a really amazing substitute. 

And don't say "non-dairy whipped topping"  - I don't even think that is really food!


With a hand-held electric beater, a stick blender or a stand mixer, you can whip 1 percent milk to mimic the fluffy topping heavy whipping cream produces. This is a common topping for espresso. A milk frother -- a specialty tool used in the preparation of espresso -- makes whipping the milk easier. The topping will be slightly bubbly and not as thick as heavy whipping cream, but it has just 102 calories per fluid cup, which yields about 2 cups when whipped. Each 2-tablespoon dollop has just 6 calories. If the milk does not froth, microwave it until it boils and carefully try to whip it again. Adding a touch of stevia makes the whipped milk sweet, mimicking the flavor of whipped cream dessert topping, without increasing the calorie content. Make only as much as you need, since the whipped milk will not stay fluffy for more than 30 minutes. Some of the milk might still be liquid, so spoon the topping onto your food or drink, rather than pouring it.


Wednesday, October 8, 2014

Pita Quesadilla

Due to a wild and crazy day, dinner plans went awry and it was time to improvise. I had my sweet husband pick up a couple of rotisserie chickens from the grocery store and decided to quickly assemble some quesadillas and use up some lingering ingredients that were nearing the end of their usable lives in my refrigerator. 


Gather your ingredients, the only things you absolutely need to have are pita bread and cheese. The rest of the ingredients are absolutely up to you. We added some chicken, salsa, tomatoes, and green onions. But jalapenos, pico de gallo, corn and beans would be a super addition as well. 


Cut your pita bread into quarters. If you have the kind that opens into pockets - even better! You can stuff you pita with your quesadilla toppings - otherwise we are just going to layer them on top. 


We picked out chicken meat off the roasted chickens and put it into a bowl. 


Spread your pitas out onto a baking sheet. 


Spread your pitas with salsa, we used two different types - a mild one and a hot, spicy one. 


Then lay pieces of your shredded chicken on top. This is where you will want to add any other toppings that you want "cooked". 


Sprinkle generously with cheese. And bake in your oven long enough for the cheese to get nice and melty. (About 5 minutes)


Once you pull the hot melty goodness out of the oven, top with your additional toppings. 


We let everyone make their own at this point.  We had some that added lots of toppings and veggies, and of course, one that just added BBQ sauce. 


This was an easy throw together meal that was satisfying and different than the normal quesadillas we are used to having.