Saturday, August 30, 2014

Plums in Season


We are enjoying some plums right now. One of my sweet sisters has a few trees and she always shares with us. This year was a great year for plums on her trees and we picked as many as we could carry away. 


Last year with the yellow plums we made Pectin Free Freezer Jam. But this year we have just enjoyed eating them so much, that I haven't needed to "make" anything with them to use them up. 

I still wanted to share with you some ideas from Food $ense. If you have some plums and are wondering what to do with them. 

Roasted Plums with Yogurt 

4 plums, pitted and cut in half
1 tbs honey
2 tsp brown sugar
½ tsp cinnamon
2 cups low‐fat or non‐fat yogurt,  
    plain or vanilla,  
½ cup almonds, slivered

Preheat the oven to 400°. Place foil on a baking sheet. Spray cooking spray on the foil and set 
aside. In a large bowl combine the plums, honey, brown sugar, and cinnamon. Stir. Place the 
plums on the baking sheet. Roast plums for 10 minutes and then stir them. Cook for another 5 
minutes or until plums are juice. Put ½ cup yogurt in 4 small bowls. Place the plums on top of 
the yogurt. Drizzle with additional honey and top off with almonds. 


Plum Salad 

2 plums—halved, pitted, thinly sliced 
1 large bag of spinach (or other dark 
 green leafy lettuce) 
1 tbs extra-virgin olive oil 
2 tbs fresh lemon juice 
3 tbs fresh orange juice 
1 tbs balsamic vinegar 
1 tsp grated orange zest 
1 tsp grated lime zest (optional) 
salt, to taste 
pepper, to taste 

In a small bowl, whisk the olive oil, lemon juice, orange juice, balsamic vinegar, orange zest, and lime zest. Season with salt and black pepper; to taste. In a large bowl, toss the spinach and plums. Add the dressing and toss well. 


Plum Smoothie

2 plums, pitted and seeded 
1 mango, peeled and pitted 
1 medium carrot, chopped 
1 cup spinach (or any other green leafy vegetable) 
½ orange juice (or other juice you have in your fridge) 

Add all ingredients to the blender and blend until smooth. Serve immediately. 
Yield: 4 servings 

Friday, August 29, 2014

Menu Planning for Back to School

If you haven't sent your kids back to school, you are most likely bound to do so any day now. Here are our house, with the kids' ages being so spread out, we have been sending kids back to school sporadically for a while now. The very last one to go started earlier this week and so now I can officially say, "all the kids are back in school".

Back to School and September in general are great times to get things back in order in your household.  January is a great time to make resolutions, spring is the time we all start new beginnings, the change of summer leads to lots of household changes and back to school is an excellent time to gets things back to the way you like them.

I love routine and I love having the schedule that comes with September. Even with my best intentions things seem to fall apart and get all crazy during the summer. Mealtimes end up being hit and miss at best as teenagers sleep in and stay up late. Little ones seem to crave snacks all day, and growing kids seem to spend hours and hours staring at the open fridge or pantry waiting for inspiration to strike.

Now is a great time to get back to the routines and practices that save our sanity. And you know Meal Planning is one of my biggest life savers. If you haven't started yet, I am inviting you to dive right in and give it a try. If you have been doing it here and there, now is the time to embrace it wholly, and if you have fallen off the wagon like me, it is time to get back in the saddle and get doing what we know Works!

Where to start? Just Dare to Do IT! Get a pencil and piece of paper, write down the days of the week and then write down what you want to make. This isn't something that you can put on your list of - when I get around to it. Or say, "I'll start doing that when I am more organized". Now is the time, just start.

Remember to Keep It Simple! Now is not the time to index all your recipes or alphabetize all your cookbooks. Resist those urges, all you need to do right now is one little week, seven little dinners.

Thursday, August 28, 2014

Chicken Cordon Bleu Casserole


Ingredients
FOR THE CASSEROLE:
1 1-lb box pasta of your choice, I used Mostaccioli
1 whole Cooked Chicken, Bones Removed, Meat Diced Or Shredded (rotisserie Chicken Is Excellent, Should Be 5-6 Cups Of Chicken ( I used 2 cans of Canned Chicken - I love Canned Chicken for casseroles
½ pounds Very Thinly Sliced Deli-style Honey Ham, Rough Chopped
¼ pounds Thin Sliced Baby Swiss Cheese

FOR THE SAUCE:
4 Tablespoons Butter
4 Tablespoons Flour
3-¼ cups Milk
2 Tablespoons Fresh Squeezed Lemon Juice
1 Tablespoon Dijon Mustard
1-½ teaspoon Salt
½ teaspoons Smoked Paprika
¼ teaspoons White Pepper

FOR THE TOPPING:
6 Tablespoons Butter
1-½ cup Seasoned Italian Bread Crumbs


Preparation Instructions
Preheat oven to 350 F. Spray a 9- x 13-inch baking dish. Set aside.

Cook your pasta, drain and then spread it into your baking dish. Put cooked shredded or diced chicken as the next layer in the baking dish. Rough chop the ham and scatter it over the top of the chicken. Lay the Swiss cheese on top of the ham.


For the sauce:

Melt the butter in a large sauce pot over medium heat. When butter is melted, quickly stir in the flour to form a smooth roux. Do not brown! Once the roux is smooth and bubbly, slowly pour in the cold milk while stirring briskly to make a smooth sauce. Cook over medium heat, stirring constantly until the sauce thickens. Stir in the lemon juice, Dijon mustard, salt, smoked paprika and white pepper. Bring sauce just back to a low boil and turn off heat. Pour sauce evenly over the casserole, being certain to get some of the sauce around the edges of the pan.


For the topping:

Melt the butter in the microwave in a medium sized microwaveable bowl. Heat it for 30 seconds at a time and stop once it’s melted. Take the bowl out of the microwave and stir in the bread crumbs. Sprinkle over the top of the casserole.

Bake casserole uncovered for 45 minutes until hot and bubbly throughout and topping has turned a light golden brown. Remove from oven and allow to cool for 5-10 minutes prior to serving.


Wednesday, August 27, 2014

French Toast Sticks a Freezer Breakfast


The frozen food breakfast aisle really has my kids' number. They would think I was the best mom in the entire world if I would let them do all the grocery shopping from that one aisle. Frozen waffles, little pancakes, breakfast burritos and sausage sandwiches, they would go crazy. The thing is, breakfast foods are one of the absolutely easiest foods to prepare ahead of time, pop into the freezer and reheat later. 


Take a little bit of extra time one morning when you have it and made a double batch (heck! make a triple batch) of french toast sticks and freeze them. You'll be set with an easy re-heat breakfast that will have your kids thinking they are enjoying the high class dining of the frozen food aisle and you'll feel awesome knowing how healthy you are really feeding and your wallet will be feeling pretty fine too. 


Ingredients:

3 eggs
3/4 cup milk
1 teaspoon vanilla
1 tablespoon butter
1 tsp cinnamon
4 slices bread, each cut, lengthwise, into 4 pieces
confectioners' sugar (optional)
cinnamon-sugar (also optional)
butter and maple syrup (if you ask me, not optional at all!) 


Preparation:

Melt butter in skillet. (We make ours on a griddle because we cook large batches of them - even when we aren't freezing them)


Whisk eggs, milk, cinnamon and vanilla in bowl. Dip the bread in the bowl to soak.


 When the butter is hot and foamy, brown the soaked bread in the skillet.

Sprinkle with a little confectioners' sugar or a sugar and cinnamon blend and serve with butter and maple syrup


To store them, let the bread cool and then place in small freezer safe food storage bags. To reheat them, take out a portion of french toast sticks and heat in the microwave for 30 seconds to 1 minute depending on your microwave oven's power. 

Tuesday, August 26, 2014

Bean Tostadas or Mexican Pizza


I believe that sometimes we over think food. Or at least, I do. Meals don't have to be overly complicated and take a lot of time and effort to prepare. Some of the most delicious foods are things that are prepared simply and allow the ingredients to just be yummy on their own. 

I think this "recipe" is one of the dishes. It comes together quickly and easily and you can pretty much add anything you want to it. You can prepare it as simply as you want for kids or picky eaters and you can get as fancy as you are feeling for adults or dinner guests. I love recipes that allow for so much customization for individual eaters. 


Ingredients

Tostada Shells (purchased or make you own by baking at 200 until crispy)
Refried Beans (and/or taco beef or chicken)
Shredded cheddar cheese
Optional Toppings:
Guacamole, green onions, salsa, sour cream, cilantro, olives, shredded lettuce, diced tomatoes etc


Directions

If you are making your own tostada shells, take your tortillas and spray both sides lightly with cooking spray. Put them on a tray and into the oven at 200 degrees. They will crisp up nicely in about 5 minutes. 


 Spread a layer of beans on top of the tostada shells.

Sprinkle with meat if you are using.

Top with shredded cheddar cheese.


 Bake at 350 degrees for 5-8 minutes or until cheese is melted.

Remove from oven and cut each tostada into 4 wedges.

Serve with optional toppings if desired.


We eat these all sorts of ways. Honestly my favorite way is with ketchup, I know that sounds strange, but it is so delicious. Some of my kids like to load them up with everything they can find and others eat them with just the beans and cheese. 

Meals don't have to be complicated and cost a lot of money. Simple dishes made with simple ingredients can really help your menu planning as well as your grocery budget. Enjoy!! 


Monday, August 25, 2014

Freezer Breakfast Sandwiches

It is officially that time of year! The Christmas of Motherhood - Back to School!!

I love the start of summer when it gets here and I love vacations and three-day-weekends, but when the ends of August rolls around it is back to school time, I am counting down the days like my kids wait for Santa Clause. 

Here is a super quick and pretty healthy breakfast option for those school mornings. Kids who eat breakfast do better in school, and mom's who have time to make that breakfast in the morning and few and far between. Almost all my kids are old enough to use the microwave and so these are the perfect option for us. 


It takes no more than 1/2 hour of time to cook, assemble and wrap about a dozen of these. You can find your own shortcuts once you have made them once or twice. You could even teach your kids how to make them and have them do it for themselves! ( I just thought of that one, and the brilliance of it has me reeling) 

Freezer Breakfast Sandwiches

12 English muffins
12 large eggs
12 slices Cheddar cheese
24 thin slices deli ham
salt and pepper

The trickiest part to these is cooking the egg. You can fry them in a pan easily enough, or if you have large muffin tins or ramekins you can bake them in the oven for 12-15 minutes. But we just cook ours in the microwave. 

Crack your egg into a glass bowl, add salt and pepper to taste and then whip it gentle with a fork. Microwave on high for 45 seconds to a minute depending on the strength of your microwave. (Once you have done one, you will know the exact time for your own microwave). 

Once your egg is cooked, give it a minute or two to cool down while you assemble your sandwich, English Muffin, Cheese and Two slices of Ham ( you can use bacon or a sausage patty if you would like, but we like ham here - and it is healthier that the other choices) then add your egg and wrap the whole thing up in plastic wrap. 


To reheat the sandwiches, remove the plastic wrap, microwave on a plate for 30 seconds, open the sandwich and cook for another 30 seconds. Total heat time will depend on microwave strength. It could take anywhere from 1-2 minutes to be completely cooked.

If you are so inclined these are great with salsa, ketchup or mustard. But you can eat them just like this and they are delicious too. 

Saturday, August 23, 2014

Build Your Own Salad


We have a local diner type restaurant that makes what they call a "sticky chicken salad". It is a good think it is a little bit of a drive and not right in my backyard or I would probably be ordering this nightly. It is actually a crazy thing, because I almost always have the ingredients on hand to make it myself. Isn't that something silly that we each do, enjoy something more because someone else made it. My kids that sandwiches are infinitely better when someone else makes them. 

Salads are a fantastic way to get creative and use up odds and ends from your fridge and pantry. The Food $ense Creates program has an amazing blue-print to help you make a fantastic salad. 


Step 1 - Choose a Base - You will probably automatically think to start with lettuce or salad greens, but you can also start with pasta, potatoes, or a whole grain like wheat berries or quinoa. 

Step 2 - Choose a Protein - You can use beef, chicken or fish (almost in any form!) Canned meat is quick and easy to use in a salad (like tuna fish or canned chicken). Beans add a delicious and inexpensive protein boost too. You can add Tofu or vegetable proteins. And hard boiled eggs make a great traditional addition to salads. 

Step 3 - Choose Vegetables - Anything goes here, you can add heaps of all different types of vegetables or you can spotlight one or two and use them exclusively. You can add them cooked, blanched or raw depending on what your prefer. Salads are a great way to use up those last few carrots sticks in the fridge or that half an avocado that is sitting on your counter. 

Step 4 - Choose Fruits - While fruits might not be a traditional choice for salads, they are delicious in them. Apples are a fantastic choice as are pears and plums. Any dried fruit can add a surprising sweetness and chewiness to a salad that will have you thinking fruits were made for salads. 

Step 5 - Choose Flavors - Look for ways to add flavors that you love to your homemade salads. Salsa is an easy to think of addition, but what about adding some freshly chopped herbs or flavored vinegar or oils. 

Step 6 - Choose a Dressing - Take it easy when it comes to dressing, you have assembled all these fantastic fresh flavors and ingredients - don't disguise them with a bottle of dressing ( You aren't making veggie soup!)  Homemade dressings are easy to whip up with a little fruit juice, vinegar or oil. Try just using plain lemon juice and some salt and pepper, that is one of my most favorite ways to dress a salad. 

Step 7 - Choose a Topping - Add a little bit of pizzazz and crunch to your salad. Homemade croutons are really easy to make and a great way to use up bread. Nuts and Seeds make amazing toppings and can add that special finishing touch. 


Building a salad is a great place to let your imagination run wild. You are only limited by what you are willing to put into your mouth! Let your family help you set up and prepare a salad bar for dinner and see what combinations they make - you may have a new hit on your hands. 

Friday, August 22, 2014

Pineapple Popsicles

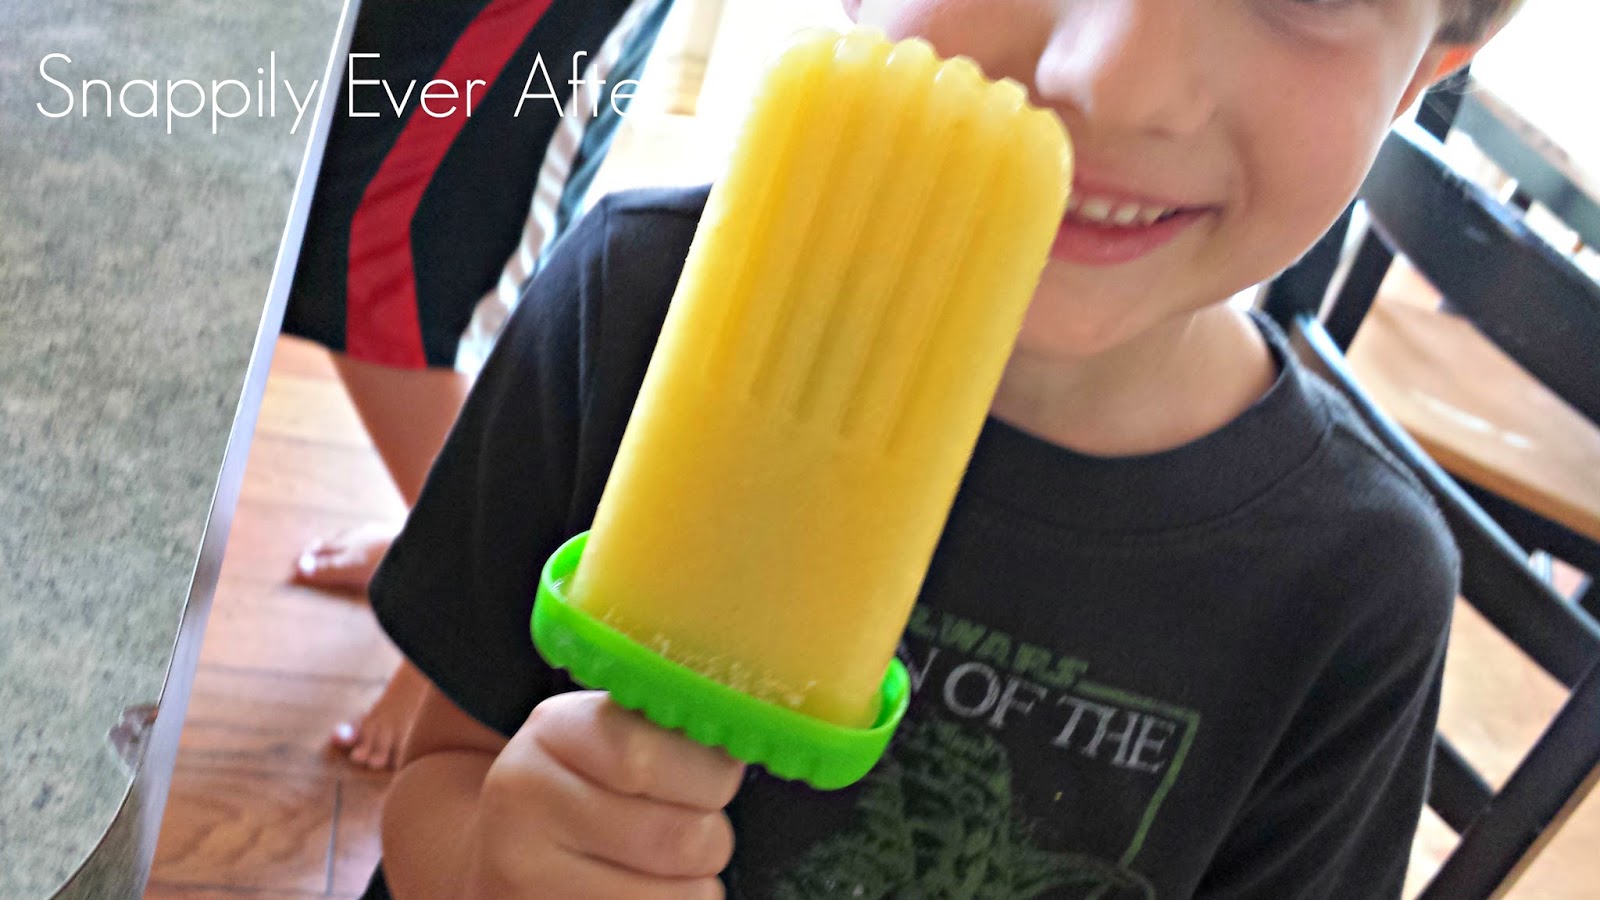
Do you ever end up with strange ingredients in your house and you aren't exactly sure what to do with them. This sometimes happens at my house. We ended up with the chopped frozen pineapple and two cans of frozen concentrated pineapple juice. It has been in the back of the freezer for longer than I care to say. 


My kids think that Popsicles essentially grow on trees, or at least they self-replicate in the freezer while we all sleep and there is a never ending supply. I know that they can be cheap to buy and you can get a lot of pressure from you kids to have them. But try and resist if you can, they are essentially just sugar and coloring and with no nutritional value at all. Not really something you would want to eat, let alone feed the growing little bodies of your kids. 

If you are feeling brave enough to experiment, you can practically freeze any smoothie that you can make. I am not quite as adventurous as some people in my house when it comes to tossing things in the blender and enjoying what comes out. But I felt pretty safe mixing pineapple fruit and pineapple juice. They reminded me of those "whole fruit" frozen juice bars that cost a fortune and look so darn good in the commercials.  


I made the juice first and then tossed it in the blender with the chunks of fruit. I didn't add any sugar or honey, or yogurt or milk, (or ice), but I think it would have been amazing with coconut milk added to it. 


We ended up with quite a bit of mixture. So we filled the plastic molds and then did our little trick that we did with the strawberry ice pops and used paper cups and wooden sticks. Just pop them into the freeze and then after about an hour, poke the sticks into the mostly frozen pops. WaaLaa!


 Big frozen-treat smiles all around!

Thursday, August 21, 2014

Extra Creamy Homemade Macaroni and Cheese


A box of pasta and some shredded cheese makes the easiest most delicious macaroni and cheese in the world. You can use almost any cheese in this from regular cheddar to Colby to even fancy Gruyere. You could use a spicy pepper jack or some Parmesan. You can also use any pasta shape that you want. Sometimes we mix it up and get a little bit crazy, but this time was nice and traditional.  Make this macaroni and cheese for your family and it will elevate comfort food to a whole new level. 


Ingredients:

8 ounces elbow macaroni
1/4 cup butter
1/4 cup flour
1/2 teaspoon salt
1 dash black pepper
2 cups milk
2 cups shredded cheddar cheese or 8 ounces cheddar cheese


Directions:


Cook macaroni according to package directions.

In medium saucepan, melt butter over medium heat; stir in flour, salt and pepper; slowly add milk.


Cook and stir until bubbly.


Stir in cheese until melted.

Drain macaroni; add to cheese sauce; stir to coat.


Yes!! It absolutely is that easy and fast. If you use two separate pans you can have the sauce whipped together before your pasta is even done cooking. Sometimes the dishes aren't worth it to me and I use the same pot to cook the macaroni and then drain it, while it sits in the sink, I make the sauce in the same pot and then just add the macaroni back it.

This is an amazing recipe and one that is easy to master. It is so much better for you than the boxed kind and your kids will feel extra special that their macaroni and cheese is homemade.


Wednesday, August 20, 2014

Orange Julius Smoothie


I absolutely go crazy for the taste of this Orange Julius smoothie. It brings back memories of being a teenager and hanging out at the mall and buying this ice-y, creamy smoothie. Orange Julius was where it was at before the days of the juice bar boom. 

When I was pregnant with my third child, these were my main craving. The healthy swaps to yogurt and milk make this a guilt-free dessert or a fantastic breakfast. I can almost guarantee that when I get the stuff out to make these, I am going to have a line in my kitchen with requests for me to "make them one too" 


INGREDIENTS

1/2 Cup Frozen Orange Juice concentrate
1 Cup Milk
1 Cup Vanilla Yogurt (I have a secret crush on this Vanilla Honey Greek yogurt - But it if you can!) 
1 Teaspoon Vanilla
2 Cups Ice


INSTRUCTIONS

Step 1 – Put the milk, yogurt, vanilla, and orange juice concentrate in the blender and blend for 30 seconds

Step 2 – Add the Ice and blend for another minute until the ice is chopped up

Step 3 – Pour into cups and serve

Be sure to add the ice to any smoothie or milkshake last.  If you put it in the blender first, it can stick together and jam up your blender.


Tuesday, August 19, 2014

Snap Specific Cookbook - Good and Cheap


I came across a news article the other day that was highlighting a brand new cookbook by Leanne Brown. I am so excited to share it with you. It is beyond amazing!! And not only has wonderful recipes and delicious ideas but brings much needed information to those of us trying to eat and feed our families healthy and yummy food on a tight budget. 

You can download the entire cookbook right Here. 

or from Leanne's own website Here. 

I absolutely love the cookbook. There are beautiful pictures and the recipes are amazing.  They allow for lots of substitutions based on taste and availability. And we all know (and are learning) that being in the kitchen is all about practicing and creating confidence. 


I have started a list in a notebook of all the things from this cookbook that I am wanting to make. I think I am going to start with the Cornmeal Coated Veggies and maybe try the Chickpea and Beet Salad since the beets are available at my local farm stand. 

A lot of the principles that this wonderful cookbook is based on are taught right here at Food $ense. We even have recipes that you can give a try. 

Monday, August 18, 2014

Healthy Snacking for Little Ones


I have some hungry little snackers at my house. They are so interested in anything that goes on in the kitchen and they really want to be a part of anything that has to do with food. They want to help mix, add ingredients and especially help with the tasting. This is all really great, but it can be frustrating when their interest wanes at dinner time and I am having to beg them to sit in their chairs and eat a meal with the family. The big boys in our family can eat so much at mealtime that it is easy for me to forget that little tummies get full really fast and sometimes feel empty just as quickly. That is why it is especially important to offer your little ones snacks that are good for them. They can't afford the junk food empty calories any more than the rest of us can.


We were shopping yesterday and grapes were on mega-sale. Grapes are a super snack food, and it just kills me in the winter when they get so expensive (not to mention they look like they are almost raisins while they are still in the store). We came across these grapes that were bigger than quarters - we had to buy them. In fact, we barely made it home to wash them before we all dove right in. 

Offering your kids healthy snacks can be an easy way to establish not only healthy eating habits but to help them develop at taste for healthy food in a non-threatening way. Sometimes when we are faced with a plate full of a new food it can seem really scary and intimidating. Having just a little bit of that same food presented in such a casual way can really add to the chances that the food will not only be eaten but enjoyed.  


If you are looking for some additional ways to present healthy snacks to your kids, Choose My Plate has some really great ideas. 

They even have a whole My Plate for Kids area full of ideas to inspire you (and motivate your kids)

Saturday, August 16, 2014

Cantaloupe with Creamy Yogurt


One of the greatest things about food is the memories that we associate with it. Perhaps you have special memories of Christmas cookies or Thanksgiving potatoes. Maybe you have special memories of your dad making pancakes on Saturday mornings or a special after school cookie your mom made just for you. 

I have lots of food memories. I don't think I am alone in the fact that some foods bring up really special feelings for me. One of those foods is cantaloupe, specifically cantaloupe with a big scoop of vanilla ice cream. My dear grandpa used love to sit down at night in the summer with a half a cantaloupe melon with a big scoop of vanilla ice cream in it. He probably would never have been able to eat the whole thing if we grand kids didn't gather around him like little birds with our mouths wide open. He was lucky to have us. 


Now that I am all grown up, one of my most favorite summer treats is cantaloupe with honey vanilla greek yogurt. I could (and sometimes do) eat it daily and eating ice cream that much isn't good for anybody. So this healthy substitution takes what feels like a special childhood dessert and makes it something I would happily serve my family as a healthy breakfast.


This is one "treat" in our family that I am more than happy to continue the tradition of eating. That is one of the greatest things about making healthy choices for yourself. You are creating positive memories and good habits for your kids and your family.